Modding
In the previous section we covered how to inspect and edit the properties of a base bot: a self-contained robot, often a single component such as an arm or a hand. A base bot is useful on its own, but it can also serve as a building block. Studio's Mod Bot system lets you compose and extend base bots without editing them in place.
The Mod Bot system is what you use to attach a hand to an arm, bolt an adapter plate between two parts, or swap one link for another, such as replacing a stock fingertip with a sensorized one. A Mod Bot does not copy the parts it builds on. It holds lightweight references to the component bots and resolves them when the bot is built. Because the reference stays live, any change to a component, for example new inertials or joint limits from a system-identification pass, propagates automatically to every Mod Bot that includes it. Fix a part once and every assembly that uses it picks up the improvement.
A Mod Bot depends on its component bots much like a program depends on libraries through a package manager: you reference a part and pick up its fixes as they land. That fits how robotics teams actually work. Some people continuously raise the fidelity of the simulation, refining meshes, tuning parameters, running system identification, or polishing visual assets, while others simply consume those assets to build and run tasks and would rather not chase and re-apply every update by hand. References let those improvements flow downstream on their own, much as continuous integration keeps a project building against the latest good version of its dependencies.
Mod Bots can also reference other Mod Bots, so assemblies nest: a workcell can reference a bimanual rig, which references an arm-and-hand combo, which references the individual arm and hand. For the underlying file format and the full set of modification types, see the SuperDex Robotics guide to Modifying Bots.
Sometimes you want the opposite: a frozen environment that will not shift underneath you, so a result stays reproducible no matter what changes upstream. That is what Bot Archival is for, capturing a bot and everything it references as a single self-contained snapshot.
Creating a Mod Bot
There are two ways to create a Mod Bot. The first starts from an existing bot: right-click its tile in the Asset Browser and choose Create Mod Bot..., which makes a new Mod Bot with that bot already set as its base. The second starts from the Asset Browser itself: right-click empty space and choose Create > Mod Bot..., which starts a Mod Bot with no base yet that you choose afterwards.
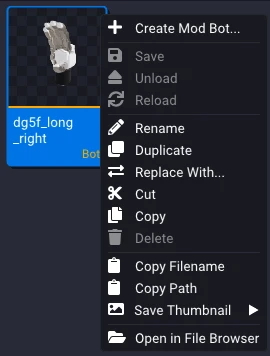
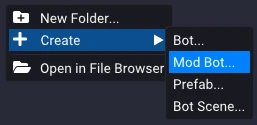
Either way, Studio adds a new .superdex_bot Mod Bot to the current folder and
prompts you to name it. Double-click the new tile to open it and start adding
modifications.
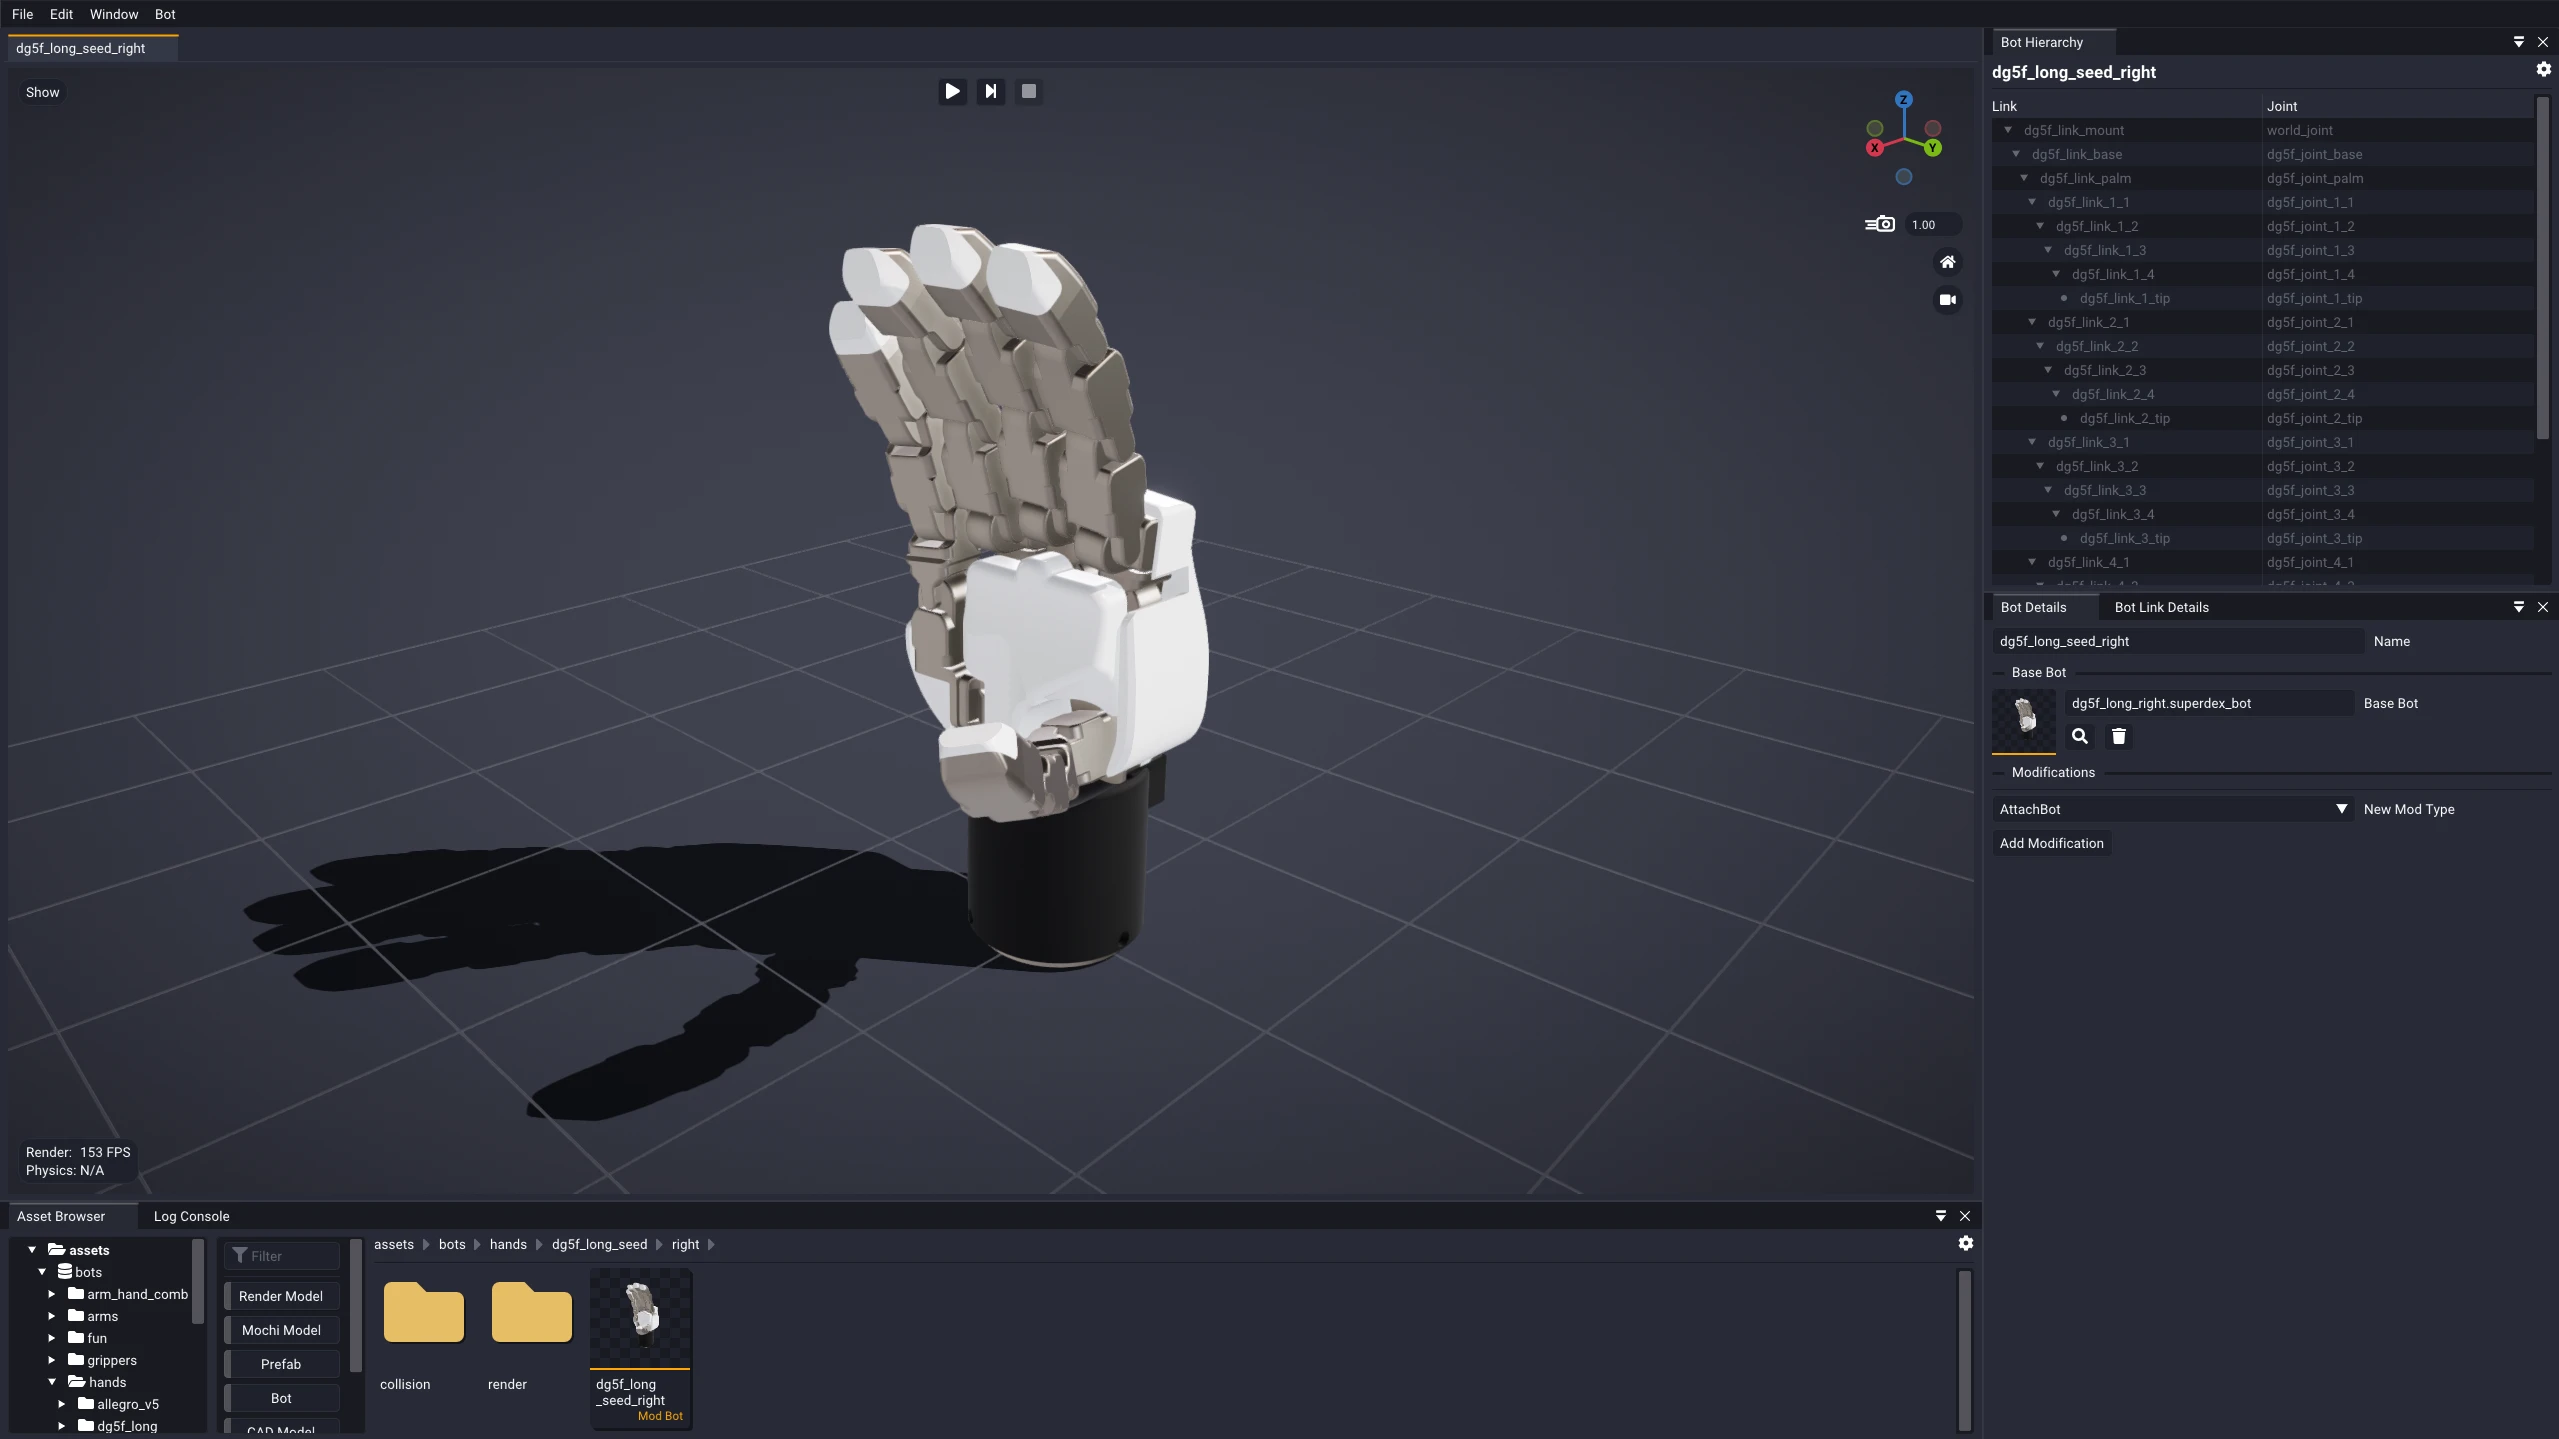
When you open a Mod Bot in the Bot Editor, the Bot Hierarchy is not editable. Everything in a Mod Bot is either inherited from its base or changed through a modification, so there is nothing to author directly in the tree. The Bot Hierarchy and Bot Link Details windows stay available for inspection, so you can browse the resulting links and joints, but their controls are disabled.
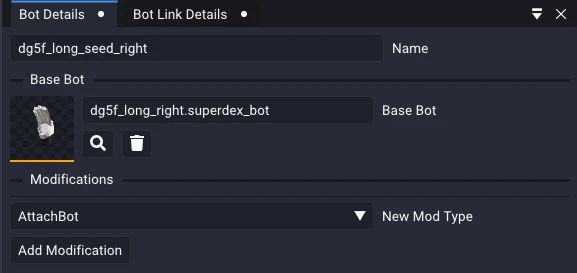
Bot Details is where a Mod Bot differs. Instead of the usual per-bot widgets, it shows controls tailored to modding: a Base Bot field to populate with the bot you are extending or modifying, and a Modifications section for building up the list of changes applied on top of it.
Adding Modifications
To add a modification, pick the kind you want from the New Mod Type dropdown and click Add Modification. Studio appends a new modification of that type to the stack, ready for you to configure.
Studio supports four modification types:
| Modification | Purpose | Key fields |
|---|---|---|
AttachBot | Attach an external bot (loaded from file) to a link on the base, joined by a new joint. The attached bot's links and joints are merged in, optionally under a prefix. | parentLinkName, joint, prefix, path |
AttachLink | Attach a single new inline link to a parent link, joined by a new joint. Like AttachBot, but for one hand-authored link rather than a referenced bot file. Useful for small adapters, such as a camera mount or a mount plate, between the base bot and an attached bot. | parentLinkName, joint, link |
ReplaceLink | Swap an existing link (and its descendants) for a new inline link, preserving the original connecting joint. Useful for retrofitting a single link, such as a sensorized fingertip. | linkToReplace, link |
ReplaceLinkWithBot | Swap an existing link (and its descendants) for an external bot, preserving the original connecting joint. The replacement's names may be prefixed, for example replacing an arm's end-effector stub with a gripper bot. | linkToReplace, prefix, path |
Here are two examples. The first uses the ReplaceLink operation to swap a target
link for a new one: you choose the Link to Replace, then author the
replacement link's properties inline, using the same widgets covered earlier for
bot editing. The second uses AttachBot to attach an
external bot to a Parent Link through a new joint, with an optional Prefix
that keeps the attached bot's link and joint names distinct.
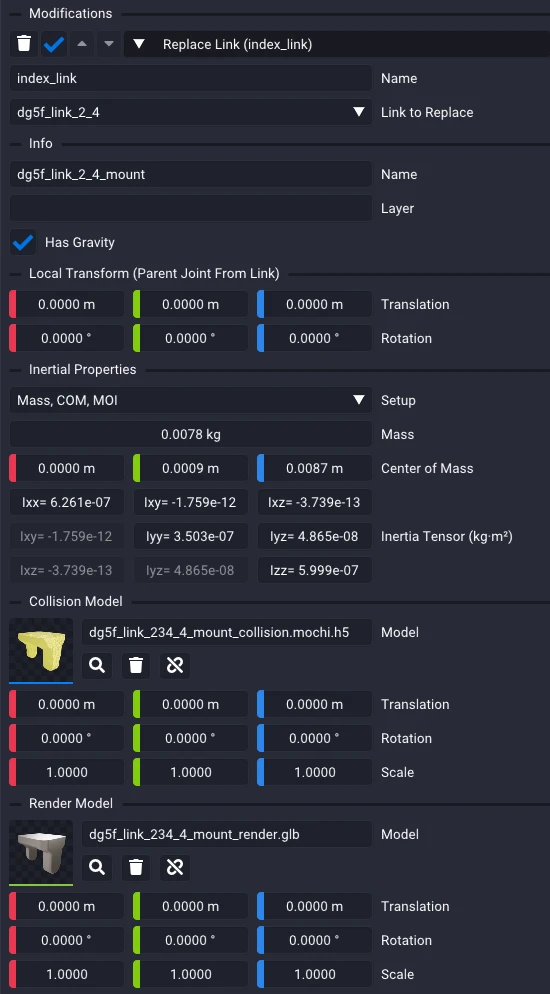
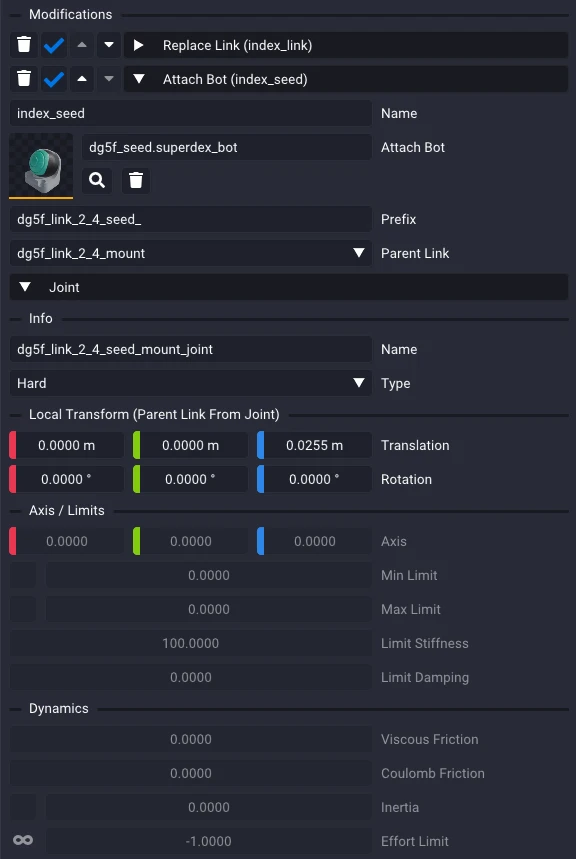
Put together, these operations build a sensorized DG5F hand from a stock one:
for each finger, a ReplaceLink swaps the fingertip for a mount link, then an
AttachBot mounts a SEED sensor onto it. The stages look like this:
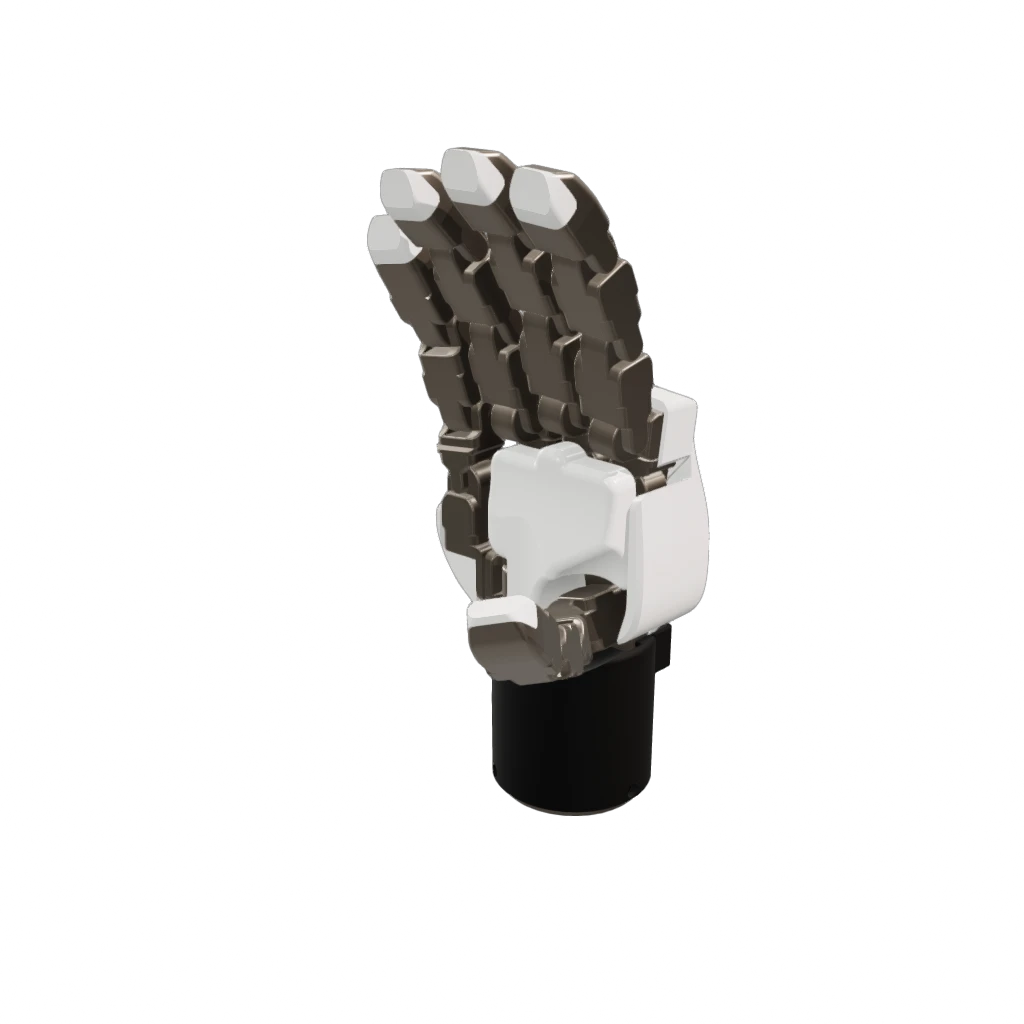
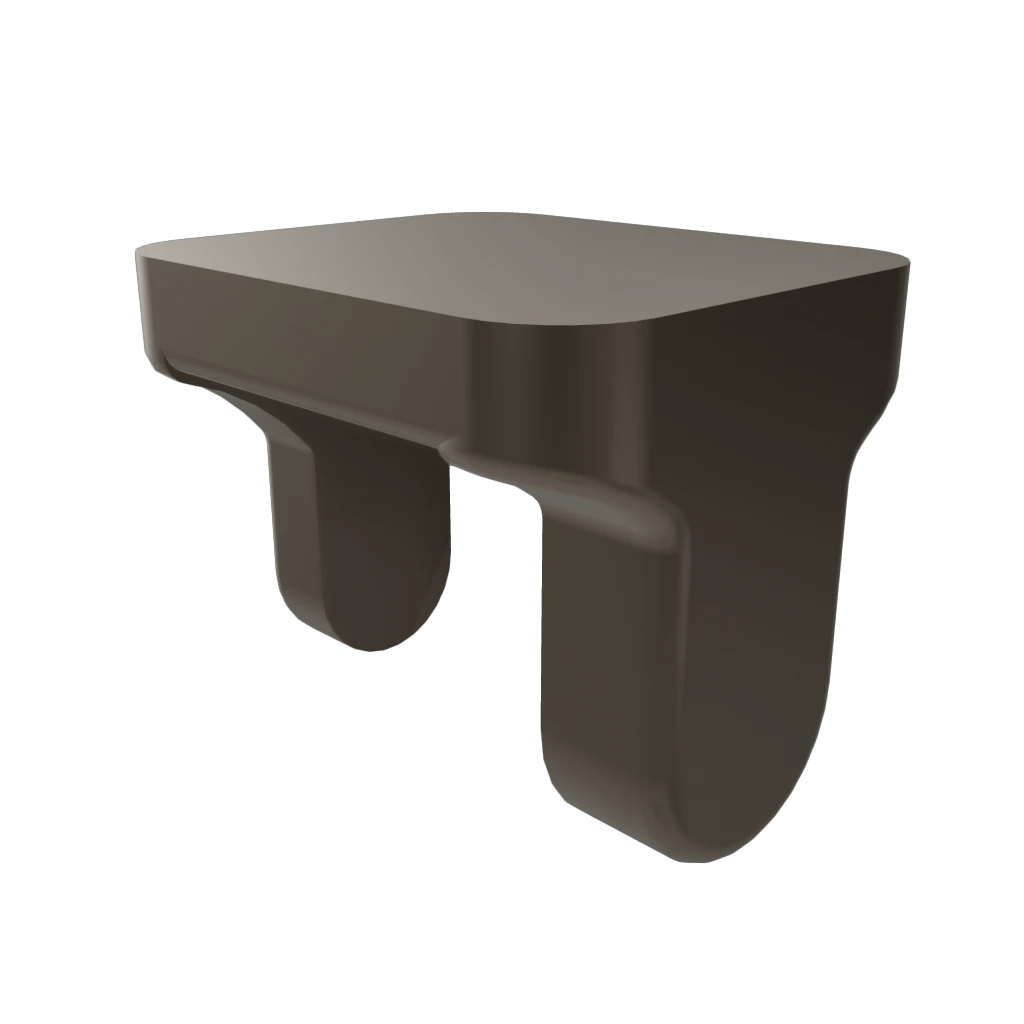
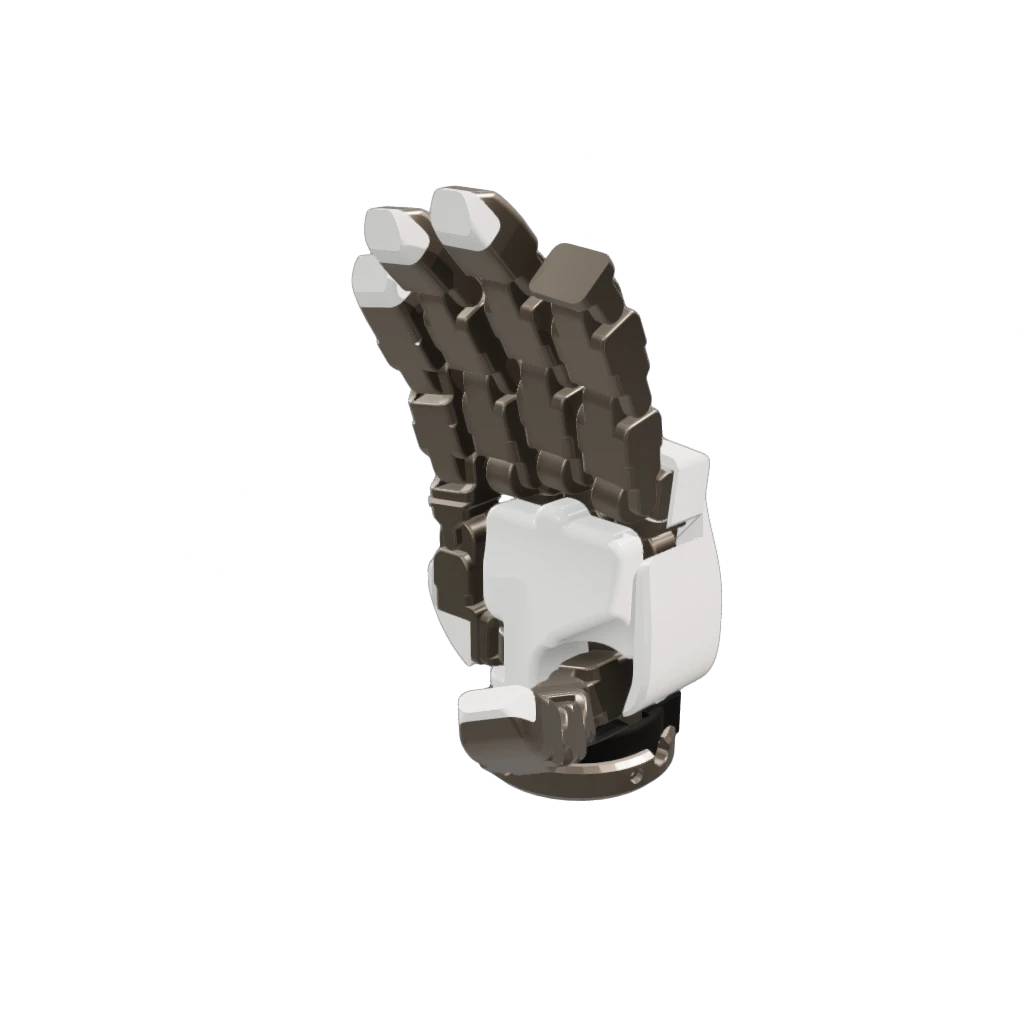
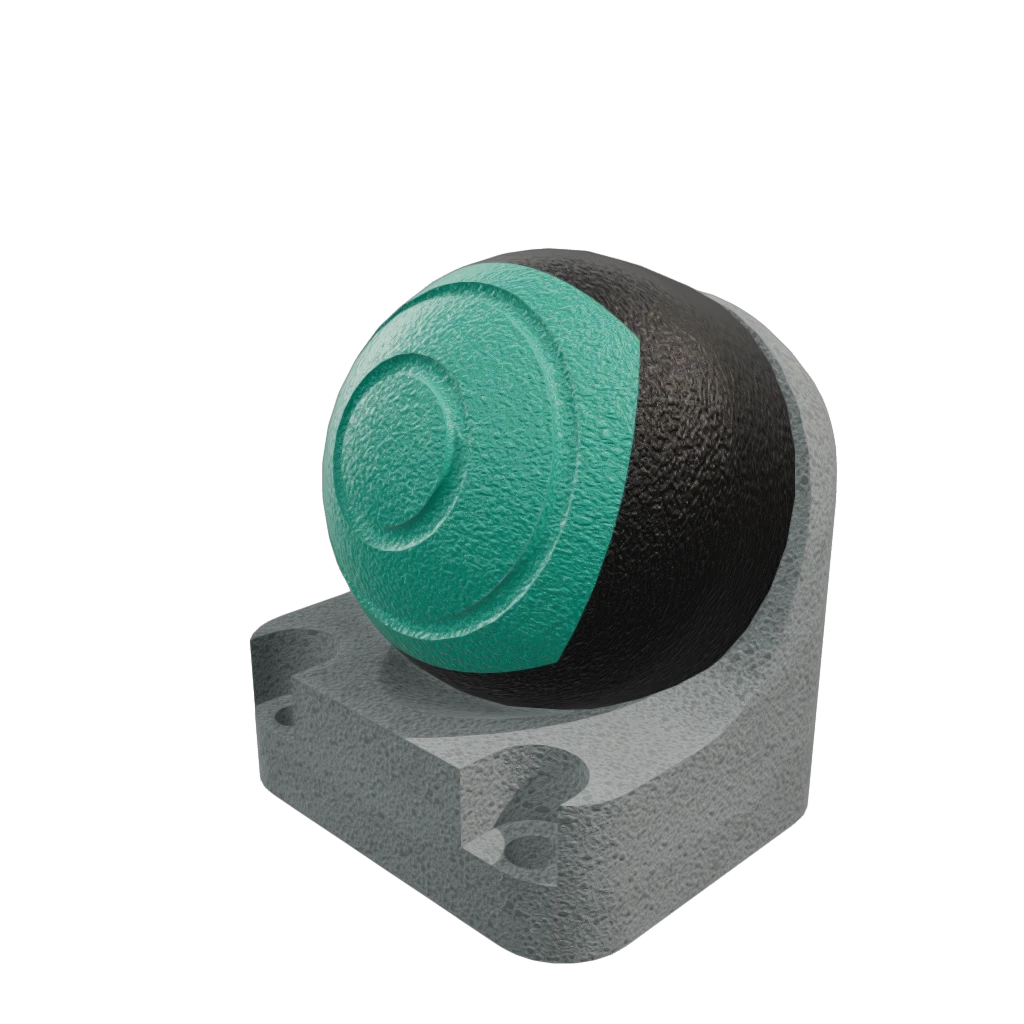
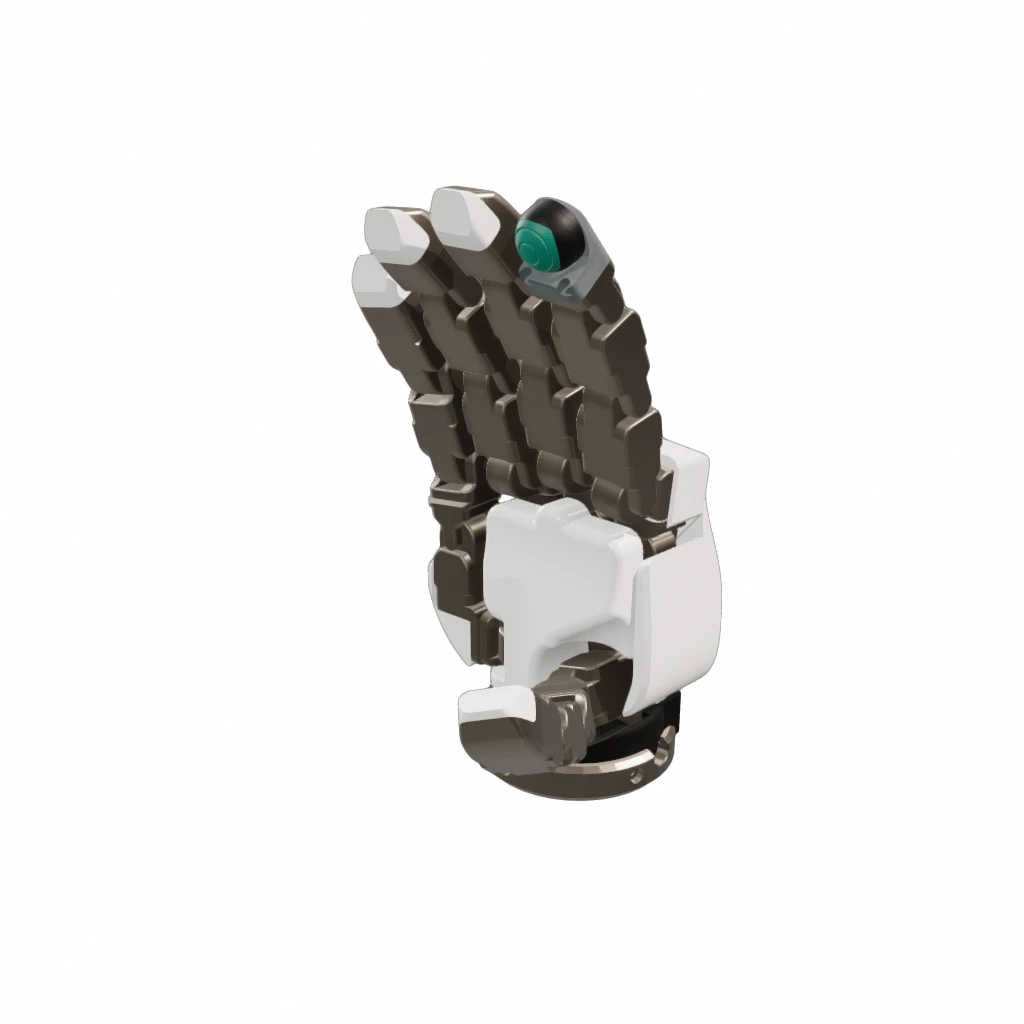
A Mod Bot can hold any number of modifications. They are applied serially, each building on the result of the one before it, so you can add as many as you like as long as every subsequent mod still builds. The video below assembles all five fingers of the seed hand this way, then walks the stack backward and forward by toggling mods on and off. Each mod's row has an enable checkbox to disable it without removing it, and a trash button to delete it.
You can disable or delete any modification freely, as long as the modifications that remain still build in serial order.
You may have noticed that the SEED sensor tip is itself a bot rather than a plain link. That is deliberate. The sensor carries properties we want to define once and reuse everywhere, such as its Sensor component and the tip material that governs its contact behavior. Packaging it as a bot lets every hand that mounts it reference that single definition, so updating the sensor once propagates the change to all of them instead of re-editing each finger by hand.
Mods All the Way Down
Nothing says a base or attached bot has to be a plain bot. Because a Mod Bot is
just another .superdex_bot, you can reference one anywhere a bot is expected, and
modifications compose recursively.
The sensorized hand from the previous example is a natural building block. Here it
is attached to an FR3 arm: the Mod Bot takes the arm as its Base Bot, then a
single AttachBot references that hand (dg5f_short_seed_right) and mounts it
on the arm's fr3_link8 wrist.
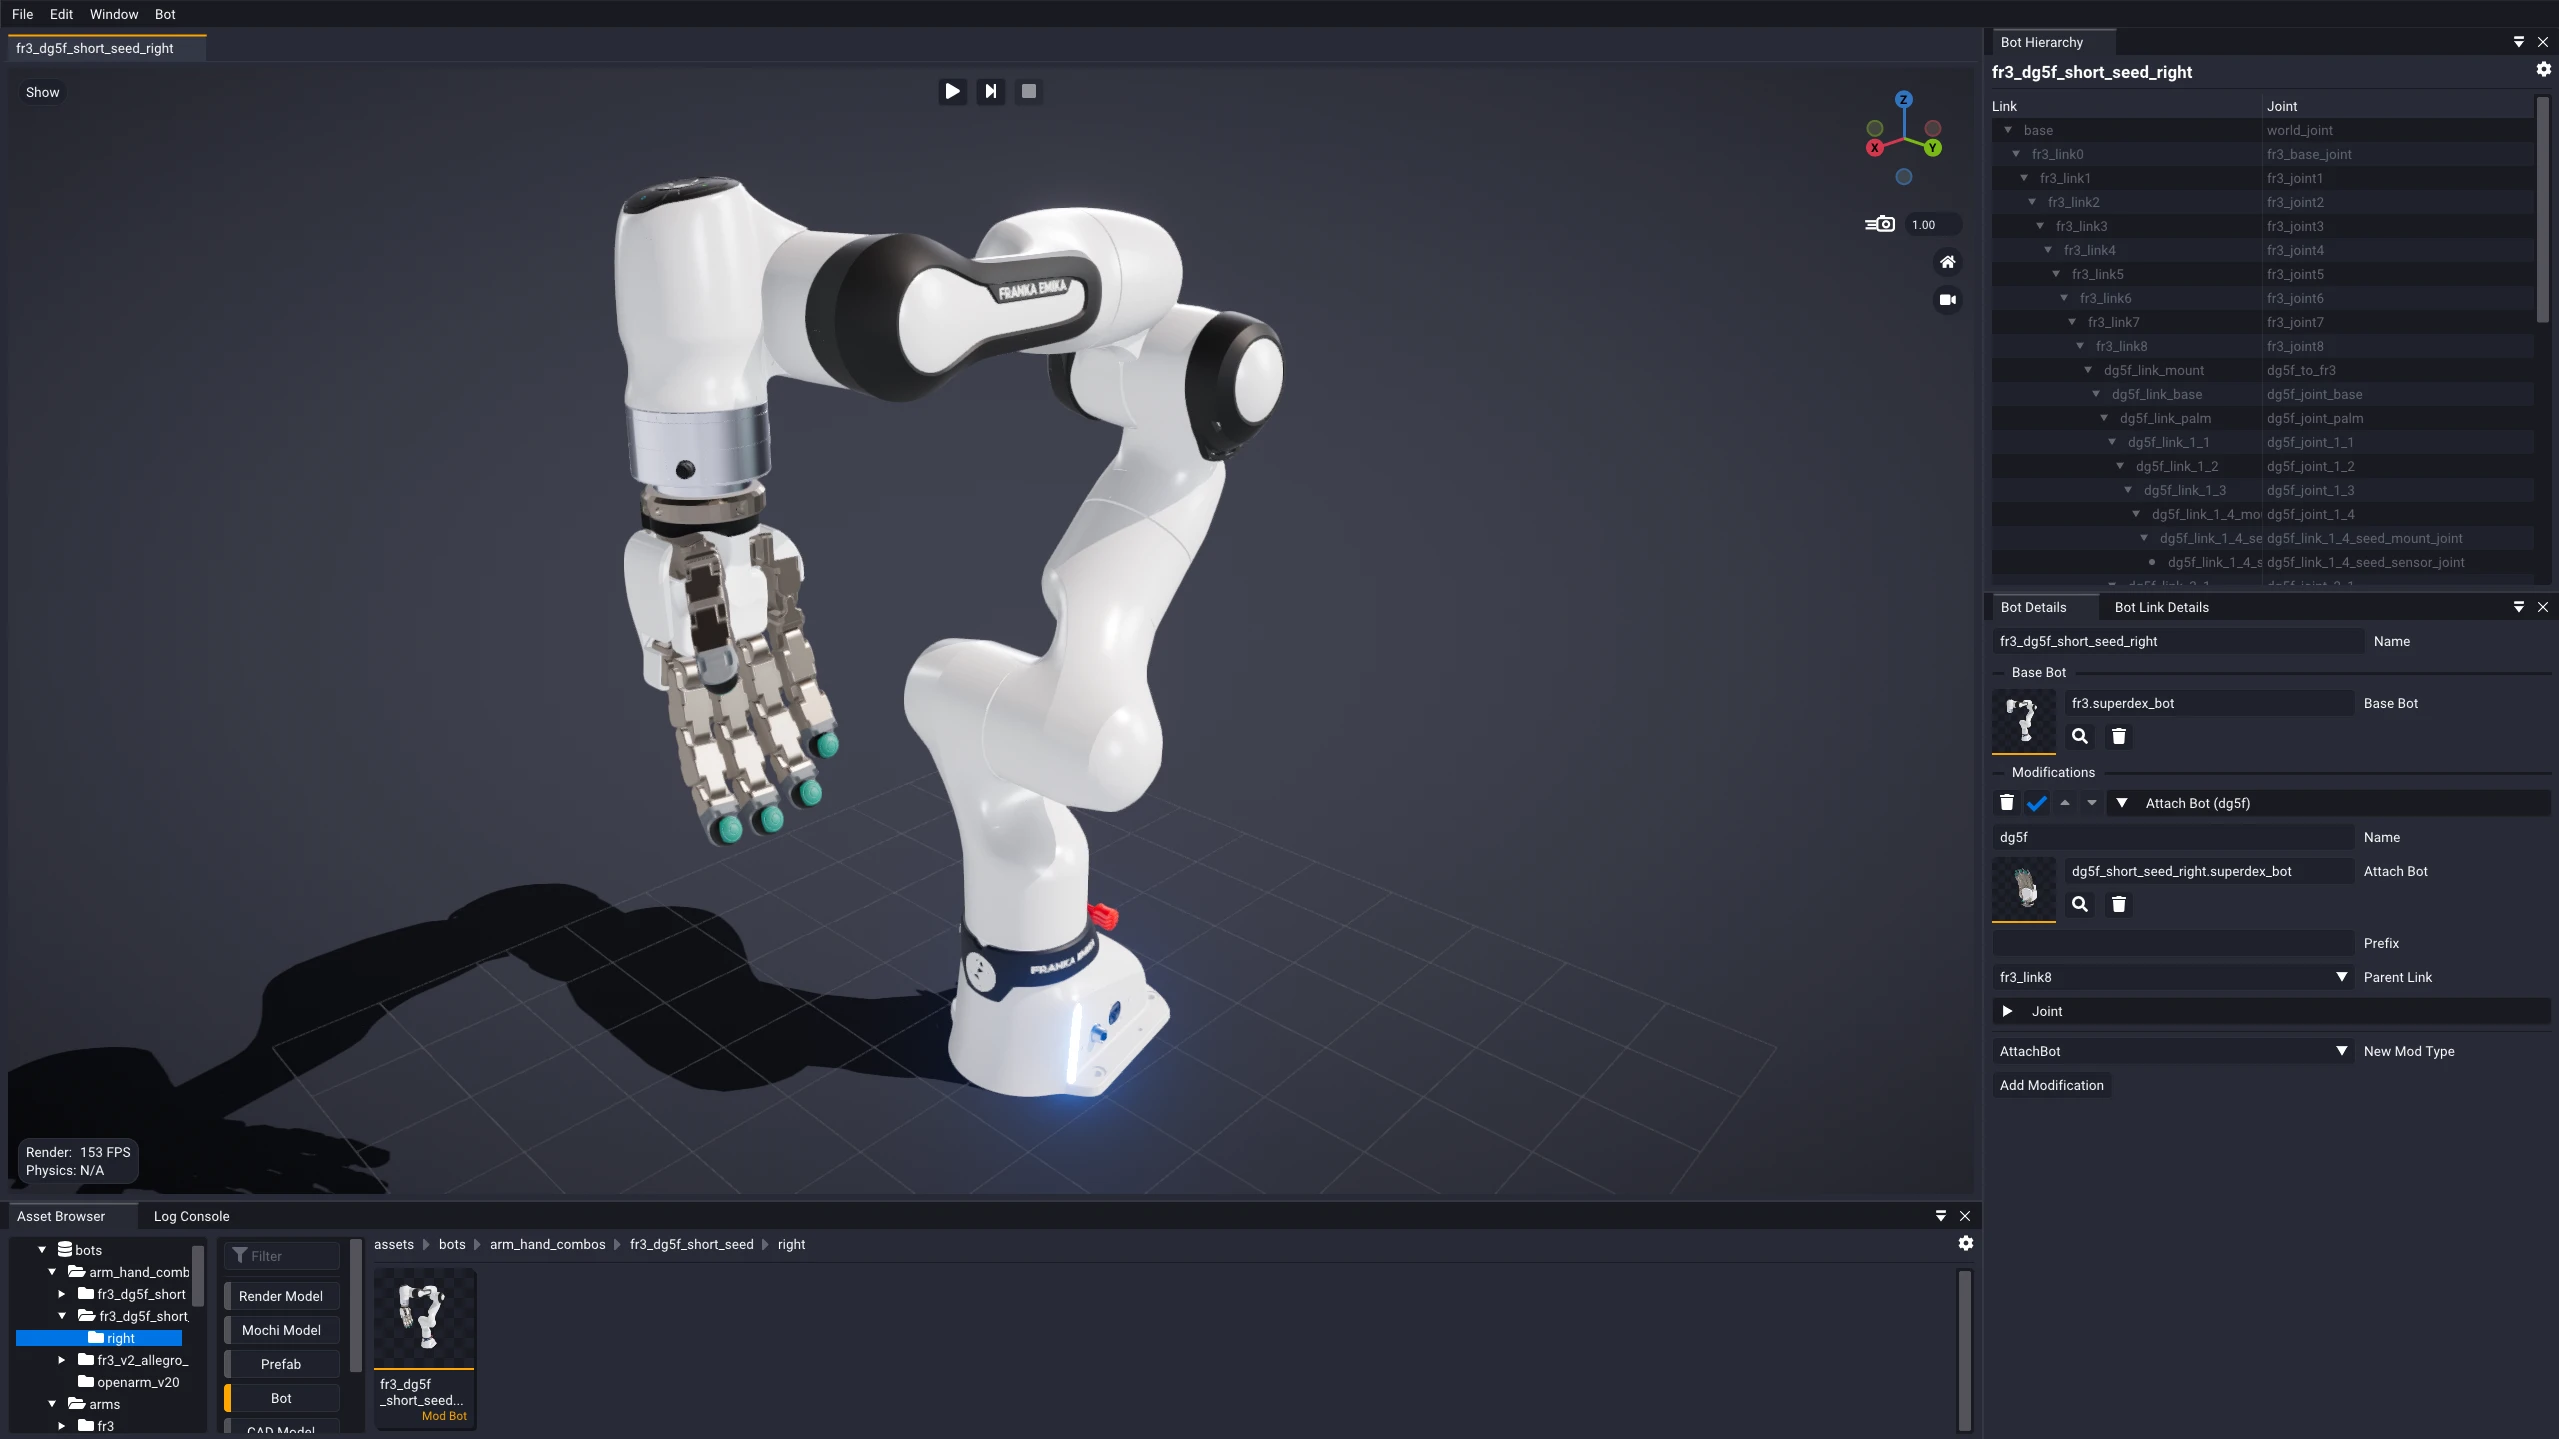
Every reference in the chain stays live, so the combined arm-and-hand bot inherits each part as it stands today. Improve the arm, the hand, or the SEED sensor buried inside it, and the change flows all the way up to this assembly the next time it is built.
More Examples
The same handful of operations covers a wide range of assemblies. Here are two more.
The first attaches a hand to an arm through a coupler. An AttachLink inserts an
intermediate adapter link, geometry that belongs to neither the arm nor the hand,
and an AttachBot then mounts the hand onto it.
The second builds out a full modular robot from separate component bots. The
OpenArm v2.0, a fully open-source modular robot, starts from a torso, then uses
AttachBot to add each arm. Its end-effectors are interchangeable: a
ReplaceLinkWithBot swaps an arm's tip for a gripper, while an AttachBot instead
mounts a WUJI hand. The video toggles these modifications on and off to switch the
robot between grippers and hands.