SuperDex CAD Exporter
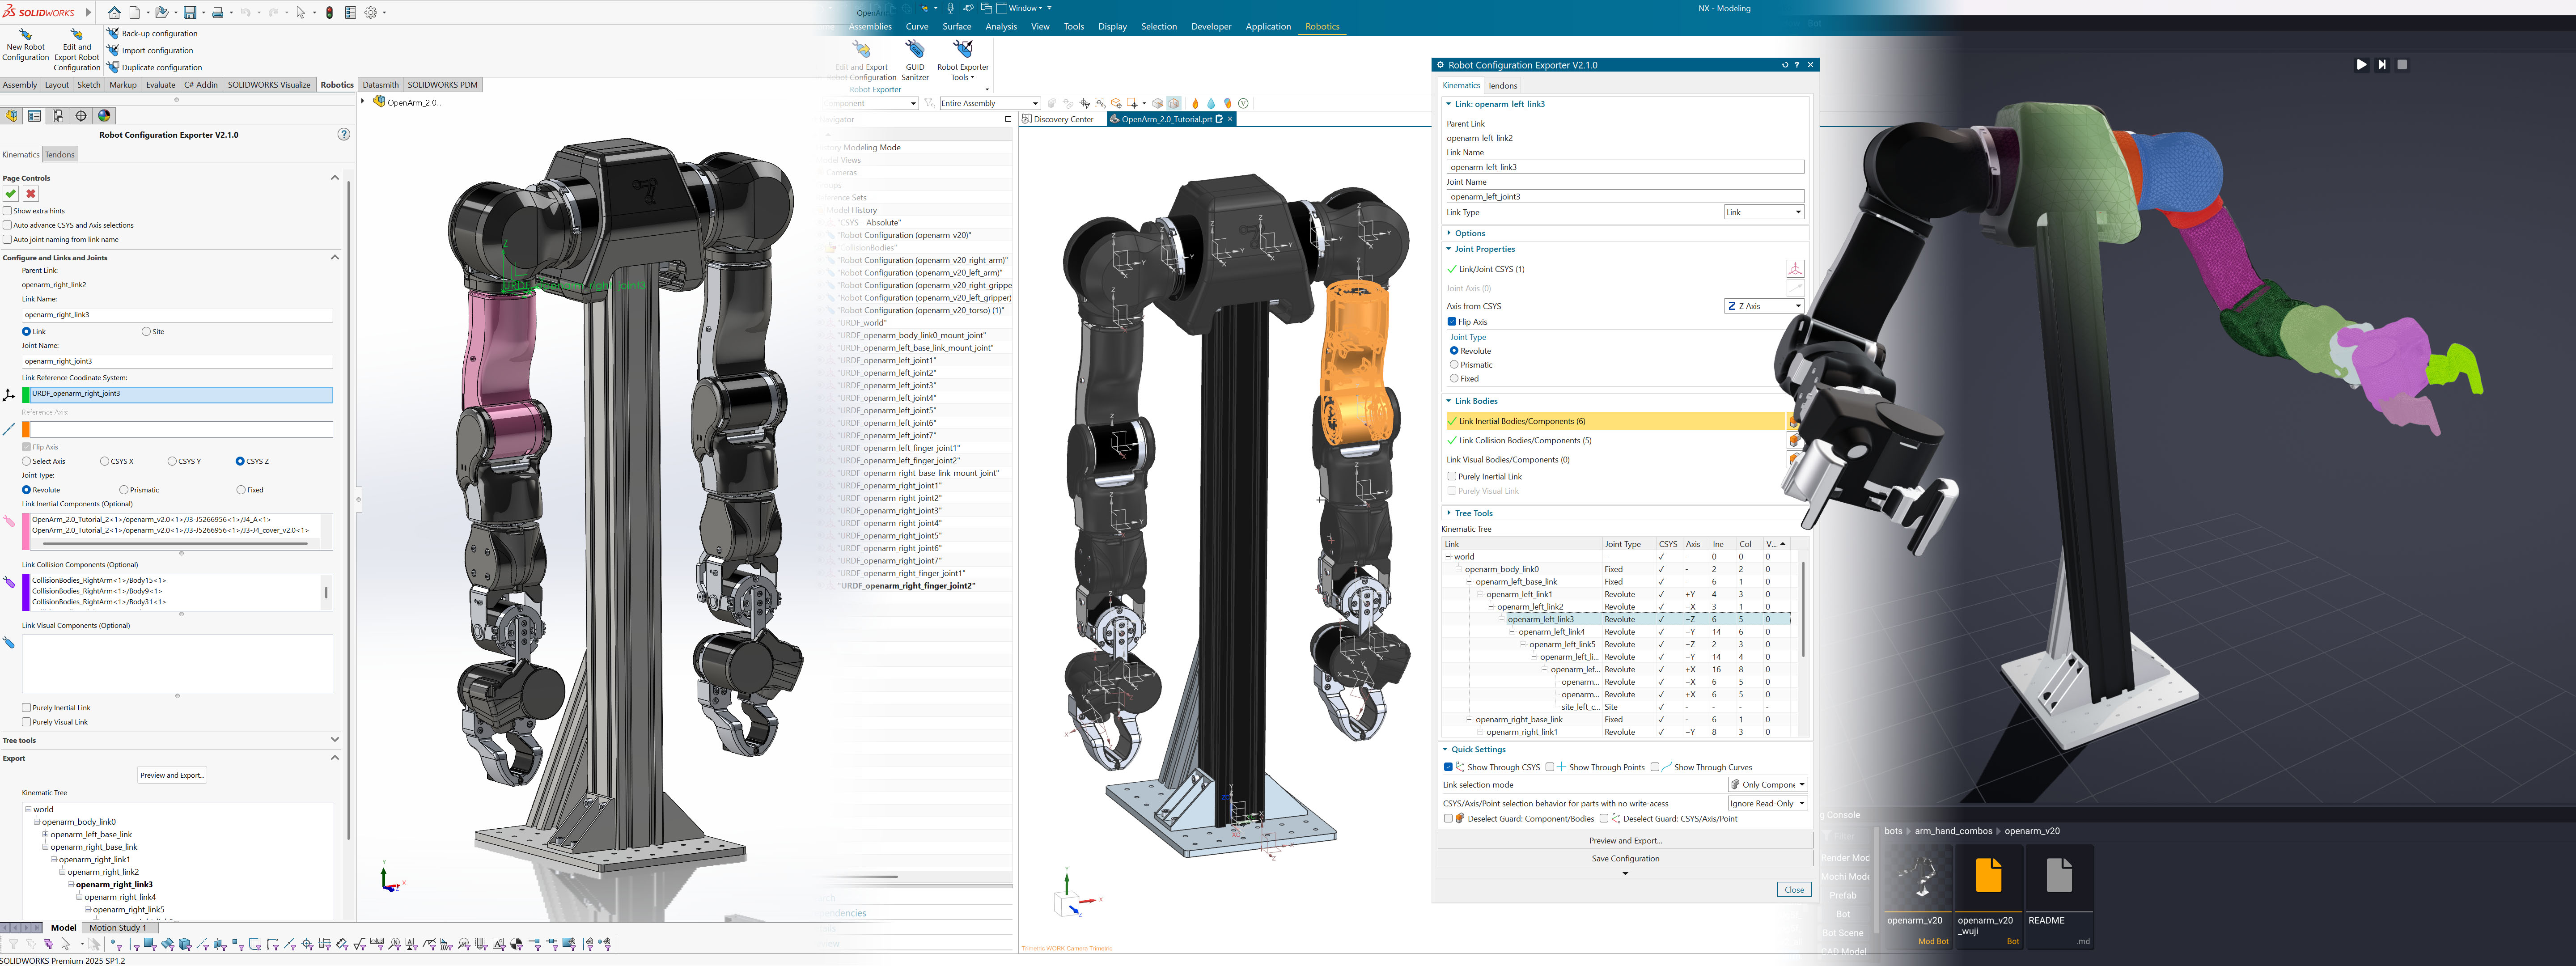
SuperDex CAD Exporter is a heavily-modified fork of the original Solidworks to URDF Exporter, primarily designed for exporting robots from both Siemens NX and SolidWorks for import into SuperDex Studio (.superdex_bot), but supports robotic definition formats .urdf and .mjcf as well.
Installation
SolidWorks
- Download the installer from the latest release on the Release page.
- Make sure SolidWorks is closed before starting.
- If you have the original Solidworks to URDF Exporter installed, please uninstall it first. (Add or remove programs → SolidWorks To URDF)
- Run the installer and go through the prompts.
- After installation, the next time you launch SolidWorks and open an Assembly, there should now be a Robotics tab in your ribbon bar.
- If not, go to Tools → Add-ins..., then tick 'SuperDex CAD Exporter' at the bottom, along with 'Start Up'. Then close and restart SolidWorks.
SuperDex CAD Exporter should NOT be installed alongside the original SolidWorks to URDF Exporter. SuperDex CAD Exporter will migrate previous URDF Export Configuration (v1.4) features in assemblies upon editing the feature (Edit and Export Robot Configuration button). The resulting feature is NOT backwards compatible.
SuperDex CAD Exporter for SolidWorks currently has a known DPI-scaling issue and will not display correctly on 1080p displays. We will address this along with a complete UI overhaul in the near future.
Siemens NX
- As we currently do not distribute binaries for the NX plugin, please follow the building instructions shown in the README.
- Make sure Siemens NX or Teamcenter NX is closed before starting
- The build process should deposit
applicationandstartupfolders intoC:/NXCustom. - Add
UGII_USER_DIRto your User or System Environment Variables (System Properties → Environment Variables...) and point it toC:/NXCustom. - The next time you launch Siemens NX or Teamcenter NX, there should now be a Robotics tab in your ribbon bar. If not, reboot your PC and try again.
Quickstart
The following serves as a general guide for the workflow between platforms. Please see the tutorial for NX and SolidWorks for in-depth guidance.
- Open your robot's top-level Assembly (SolidWorks) or Assembly/Part (NX)
- Every Joint/Link origin must have a Coordinate System, which can be in any level of the assembly (in individual parts/components or in the assembly itself)
- For any Joint Axis that is not collinear with the Link's Coordinate System's primary axes (±X, ±Y, ±Z), add an Axis (Datum Axis for NX) for every prismatic or revolute joint. This axis can also be in any level of the assembly.
- Create a new Robot Configuration from the Robotics tab.
- Right click the base_link and click Add Link for each link in your kinematic chain (links can have multiple children), or use the Tree Tools to construct serial chains or import trees from plain text.
- For the base/world link, select your global/world Coordinate System, and the parts or assemblies that represent the Inertial, Collision and Visuals (all optional) of the link.
- For each kinematic link, select a Joint Type, Coordinate System, the parts or assemblies that represent the Inertial, Collision and Visuals (all optional) of the link. Then select either the Coordinate System's axes representing the joint axes or an Axis/Datum Axis.
- If needed, save your progress and close the exporter to work on the assembly by clicking on the checkmark above (SolidWorks) or use the Save Configuration button (NX).
- Once you're ready, click the Preview and Export button
- Wait for temporary features to be created for calculating Link/Joint frames.
- Optionally configure Joint Properties, Link Properties or view the Kinematics Summary or Tendons Summary.
- Configure the meshing options and export the robot from the Link Properties tab. Click on the Export Robot and Meshes button to begin the export and meshing process.
- The exported .superdex_bot can be readily copied into SuperDex Studio's workspace for further processing and simulation. It is highly recommended to export Collision meshes as STEP files for meshing in SuperDex Studio. Visual meshes should be exported as .glb for SuperDex Studio. All other simulation platforms may not have full compatibility for other mesh formats.
Link Export Guide
The following is a table for what is used for exporting the inertial properties in the resulting .superdex_bot, .urdf and mjcf .xml, what is exported for the collision meshes, and what is exported for the visual meshes depending on the selections made for the Inertial, Collision and Visual bodies/components.
For instance, if you selected some Inertial bodies and Collision bodies, but no Visual bodies, then the <inertial> properties will be calculated using Inertial bodies, the <collision> meshes will be exported from the selected Collision bodies and the <visual> meshes will be exported from the selected Inertial bodies.
| Inertial Bodies | Collision Bodies | Visual Bodies | Purely Inertial Link checked | Purely Visual Link checked | <inertial> properties | <collision> meshes | <visual> meshes |
|---|---|---|---|---|---|---|---|
| ✅ | ✅ | ✅ | - | - | Inertial | Collision | Visual |
| ❌ | ✅ | ✅ | - | - | Visual | Collision | Visual |
| ❌ | ❌ | ✅ | - | - | Visual | Visual | Visual |
| ✅ | ❌ | ✅ | - | - | Inertial | Visual | Visual |
| ✅ | ✅ | ❌ | - | - | Inertial | Collision | Inertial |
| ✅ | ❌ | ❌ | - | - | Inertial | Inertial | Inertial |
| ❌ | ✅ | ❌ | - | - | Link has no mass | Collision | Link has no visuals |
| ✅ | ❌ | ❌ | ✅ | - | Inertial | Link has no collision | Link has no visuals |
| ❌ | ❌ | ✅ | - | ✅ | Link has no mass | Link has no collision | Visual |
| ❌ | ❌ | ❌ | - | - | Link has no mass | Link has no collision | Link has no visuals |
Mesh Export Guide
Use the following guide for figuring out which mesh format to use. The built-in Presets also serve as a good starting point if you are unsure.
Siemens NX
| Use Case | Recommended Format | Notes |
|---|---|---|
| SuperDex Studio highest fidelity | Visual: GLB, NX Collision: STEP, NX | Collision STEP files should be processed in SuperDex Studio |
| SuperDex Studio preview, fastest export | Visual: GLB, NX Collision: STL, NX | Collision meshes will most likely not be watertight, but can be used for quick previews, should not be used for final assets |
| SuperDex Studio deformable meshes | Visual: GLB, SuperDex Collision: STEP, NX | Visual meshes that require skinning should use SuperDex meshing |
| MuJoCo | Visual: GLB, NX Collision: STL, NX | Convert GLB to OBJ and post-process due to how MuJoCo handles multi-body OBJs |
| ROS/RViz/Rerun | Visual: GLB, NX Collision: OBJ, NX | Note that RViz has bug with GLB's being displayed with the wrong coordinate frame, post-processing may be required |
SolidWorks
| Use Case | Recommended Format | Notes |
|---|---|---|
| SuperDex Studio highest fidelity | Visual: GLB, SuperDex Collision: STEP, SW | Collision STEP files should be processed in SuperDex Studio |
| SuperDex Studio preview, fastest export | Visual: STL, SW Collision: STL, SW | Visual meshes will look faceted/ugly. Collision meshes will most likely not be watertight, but can be used for quick previews. Should not be used for final assets |
| SuperDex Studio deformable meshes | Visual: GLB, SuperDex Collision: STEP, SW | Visual meshes that require skinning should use SuperDex meshing |
| MuJoCo | Visual: OBJ, SuperDex Collision: STL, SW | Post-processing required due to how MuJoCo handles multi-body OBJs |
| ROS/RViz/Rerun | Visual: GLB, SuperDex Collision: STL, SW | Note that RViz has bug with GLB's being displayed with the wrong coordinate frame, post-processing may be required |
See also
- Model Editor Guide — the modifier stack that builds collision geometry.
- Bot Editor Guide — articulation, contacts, and Mod Bots.