User Interface
SuperDex Studio is a native Dear ImGui application with a dockable, document-centric layout: a persistent frame of panels around one editor tab per open asset. It is where you author high-fidelity bots and prefabs for your applications. This page will show you what each region of the window is for, and how to drive the viewport.
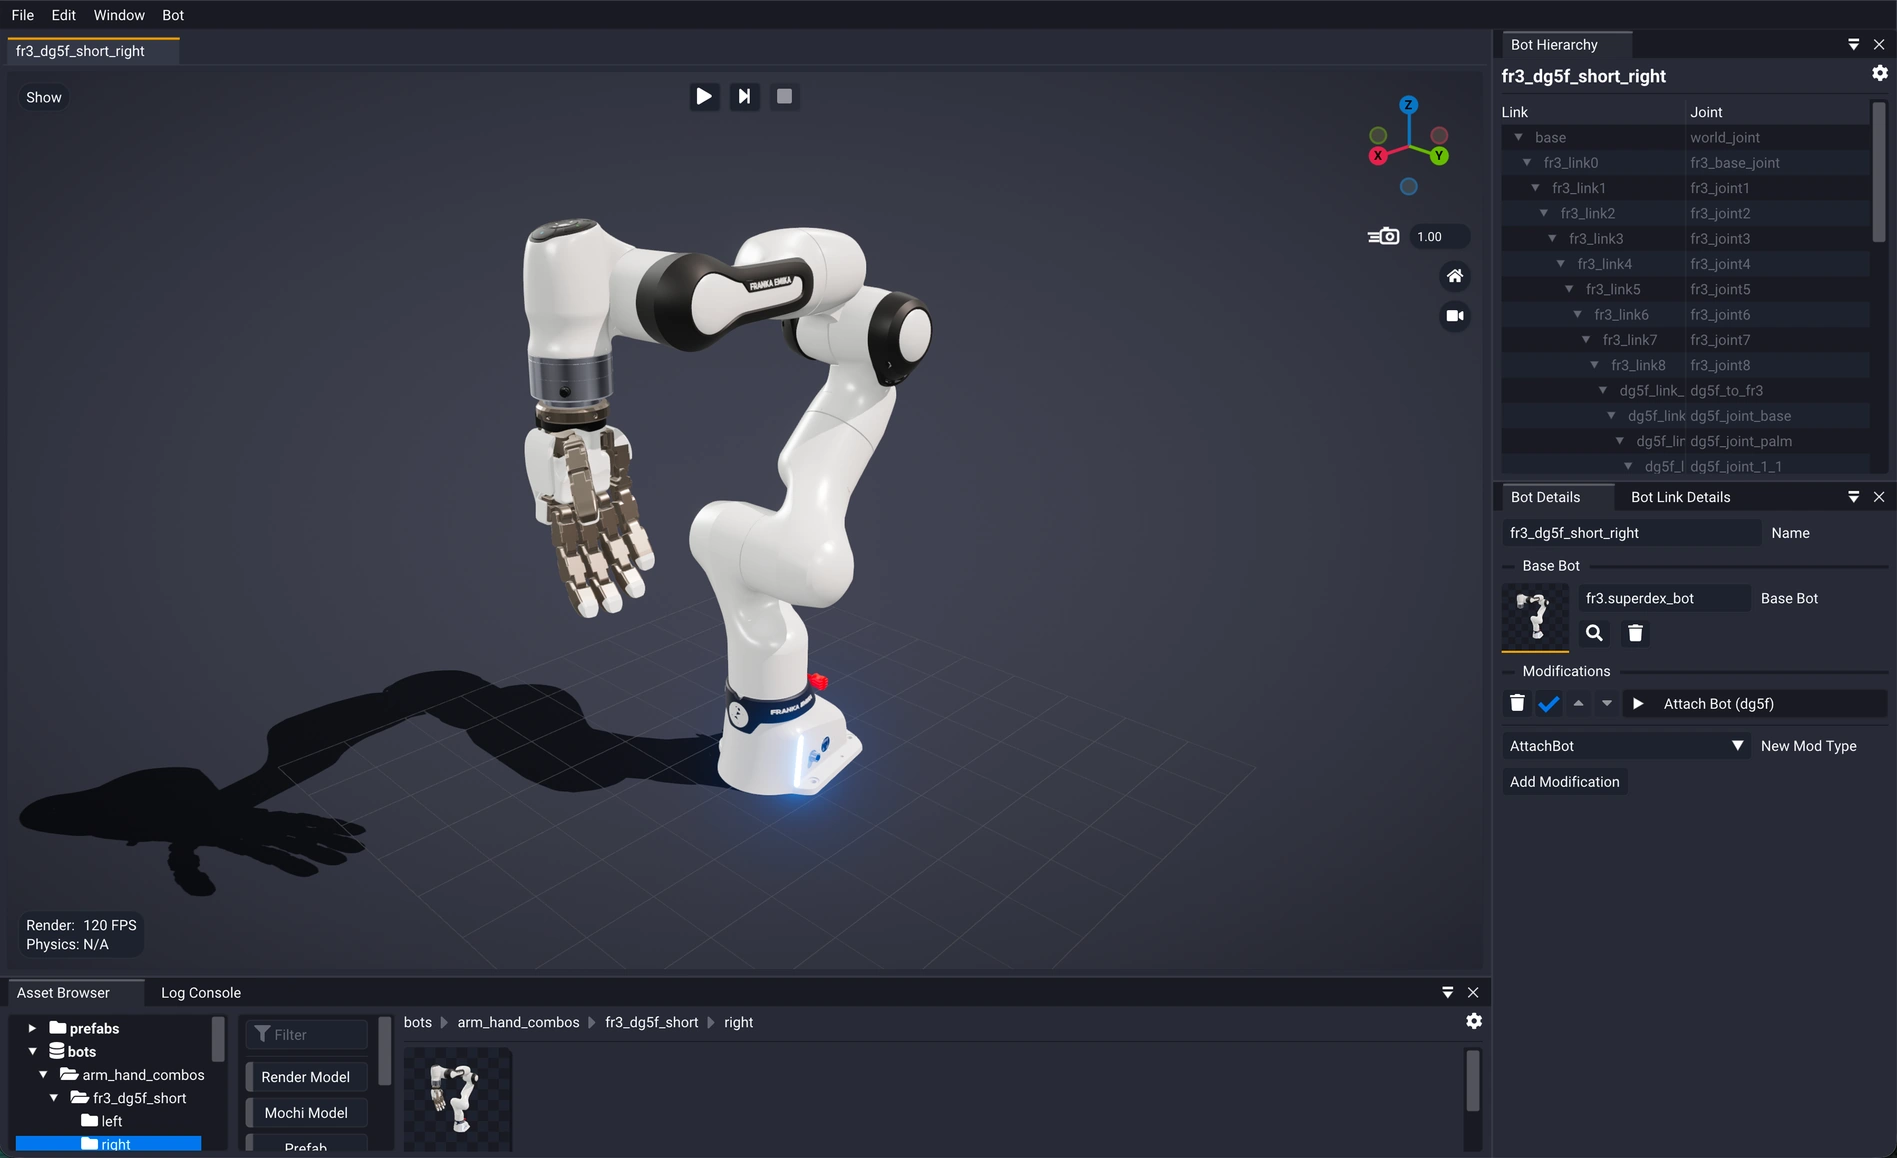
Window
Studio opens with a viewport in the center, a Hierarchy and a Details panel stacked down the right, and the Asset Browser and Log Console tabbed together along the bottom.
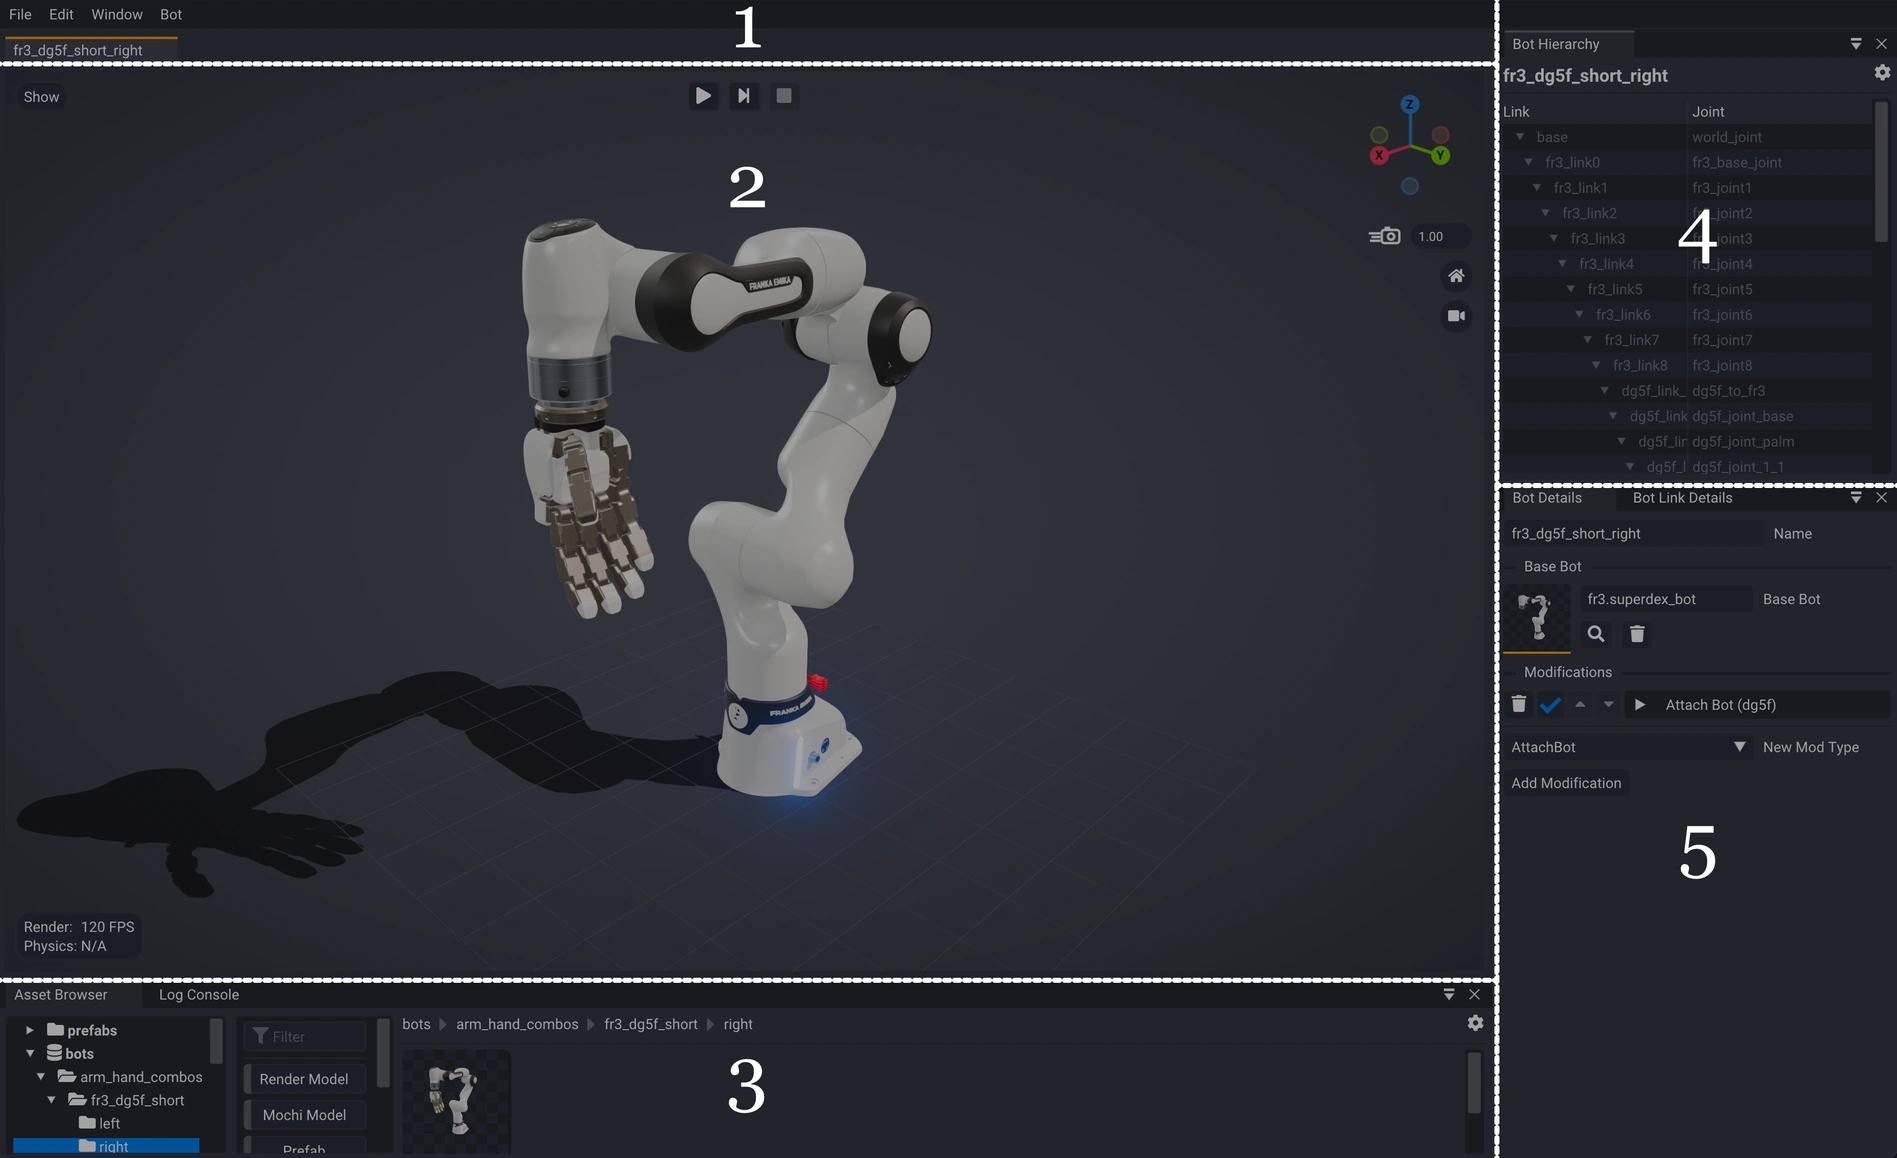
| Region | What it's for | |
|---|---|---|
| 1 | Menu and tab bar | App-wide commands, and one tab per open asset. |
| 2 | Viewport | The 3D view: camera, selection, gizmos, and live physics. |
| 3 | Asset Browser / Log Console | Two panels tabbed into the bottom dock. |
| 4 | Hierarchy | The structure of the open asset: links, or actors. |
| 5 | Details | The inspector for whatever is selected. |
Every panel is dockable, and Studio remembers how you left it. The arrangement
is written to SuperDexStudio.ini and app settings to SuperDexStudio.json,
both under your user config directory, so the layout survives a restart.
Window → Reset Layout puts everything back if you dock yourself into a
corner. Do not confuse it with File → Reset Studio, which closes every
editor and clears the workspace.
Press F10, or use Window → Focus Mode, to hide every panel and the tab bar
and leave just the menu bar and the viewport. Press F11, or use Window →
Borderless Fullscreen, to hide the operating-system window chrome without changing
the docked panels.
Undo is per editor tab: each open asset keeps its own stack, so Ctrl+Z and
Edit → Undo apply to the tab you are in. Undo is unavailable while a
simulation is running, and the Model Editor has no undo stack at all; its
modifier list is edited directly instead.
Menu and Tab Bar
The menu bar carries File, Edit, and Window. The active editor may
add one of its own: a bot tab also gets a Bot menu. Below it, the tab bar
holds one tab per open asset, named after the asset and marked with a dot while
it has unsaved changes. Click a tab to switch, or use PgUp and PgDn. Note
that PgUp moves right along the bar. Ctrl+W closes the active tab.

Viewport
The viewport shows whatever the active tab has open, rendered with Filament. In the editors that support it, physics runs live in the same view, so an edit and its consequences appear together.
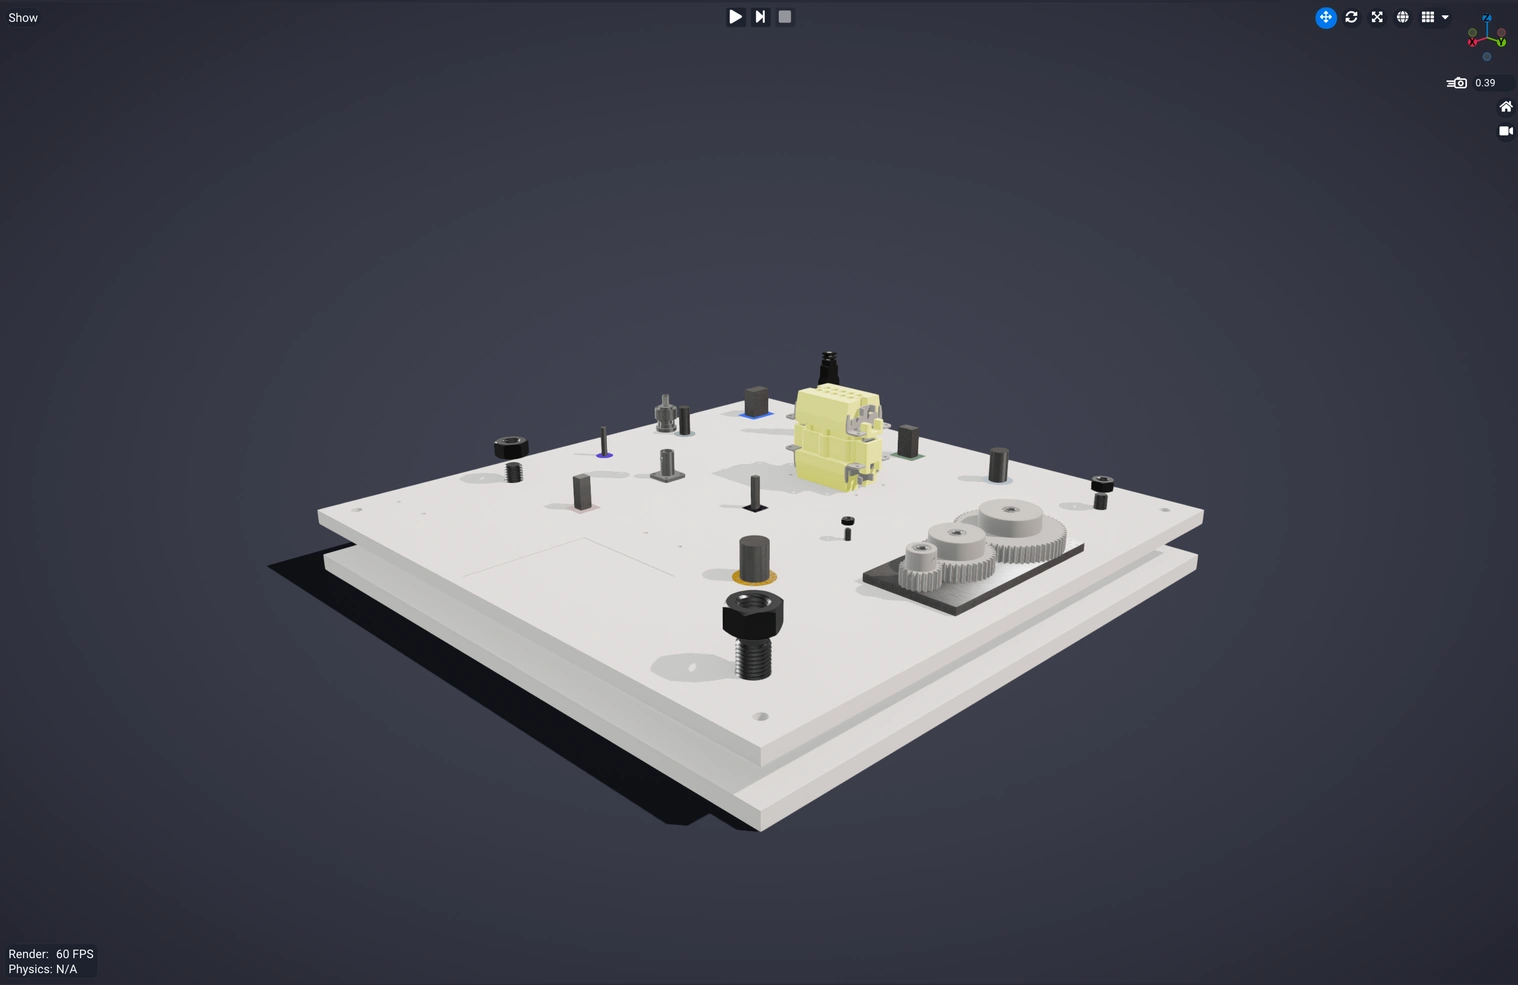
Navigate Viewport
There are two ways to work the camera: drag it around by hand, or snap it to a known view. Dragging is all mouse, and each gesture is one continuous motion.
| Move the camera | How |
|---|---|
| Orbit | Alt + Left-click and drag, or drag the coordinate system in the top right corner |
| Pan | Middle-click and drag |
| Zoom | Scroll up or down |
| Flight Camera Control (gamestyle) | Hold Right-click and translate with W A S D, plus Q down and E up. Shift gives a 4× boost, and Scroll changes the flight speed |
Snapping jumps the camera to a fixed vantage point. Every one of these has a keyboard shortcut, and most have a clickable equivalent in the top right corner of the Viewport.
| Snap to a view | Shortcut | On-screen |
|---|---|---|
| Center to object | F, or Numpad . | — |
| Home view | Home |  |
| Axis-aligned views | Numpad 1 front, 3 right, 7 top. Add Ctrl for the opposite face | 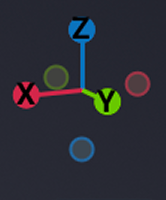 |
| Flip to the opposite side | Numpad 9 | — |
| Perspective / orthographic | Numpad 5 |  |
Snapping re-frames as well as rotates: the camera centers on whatever is selected, or on the whole scene if nothing is.
Left-click and drag on its own is not a camera control. Plain left belongs
to selection, the transform gizmo, and force-dragging. Panning is on
Middle-click, and orbiting needs Alt.
Camera Speed
A decimal number between 0.01 and 1000 defines the speed of the Flight
Camera Control. It starts at 1.0; try around 0.5 if that feels fast in a
small scene. Change it with Scroll while a camera control is
held, or type a value straight into the field next to the camera symbol in the
top right corner of the Viewport. The value carries over to the next viewport
you open.
On a trackpad, two-finger scroll acts as the scroll wheel, so it zooms and
adjusts camera speed the same way. Panning and orbiting still need a middle
click or Alt, so a mouse is easier for sustained viewport work.
View Modes
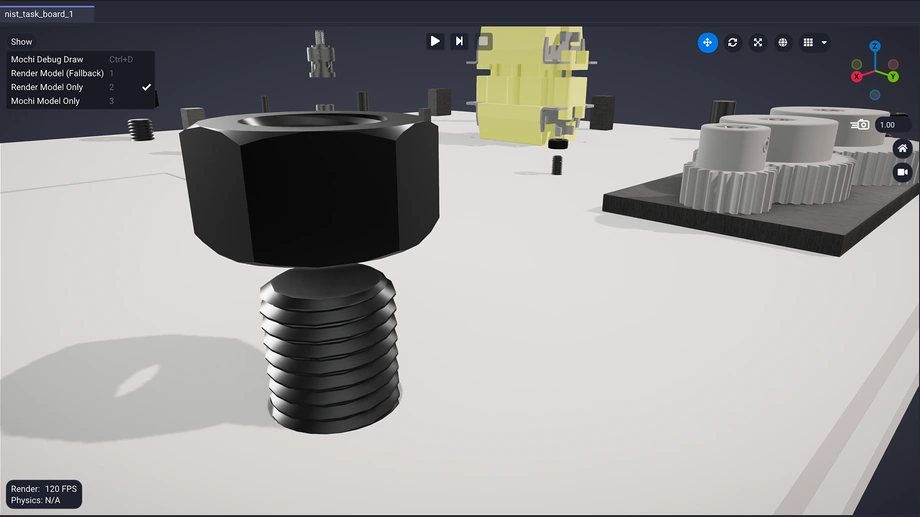
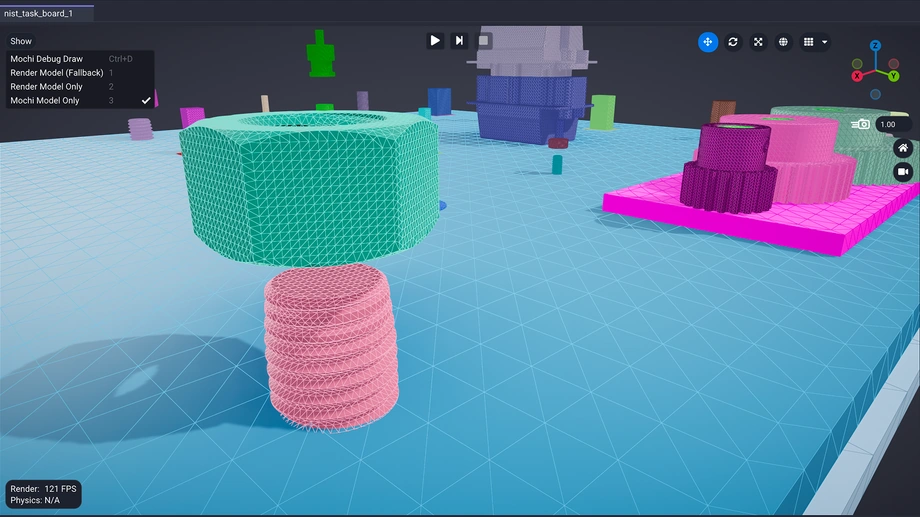
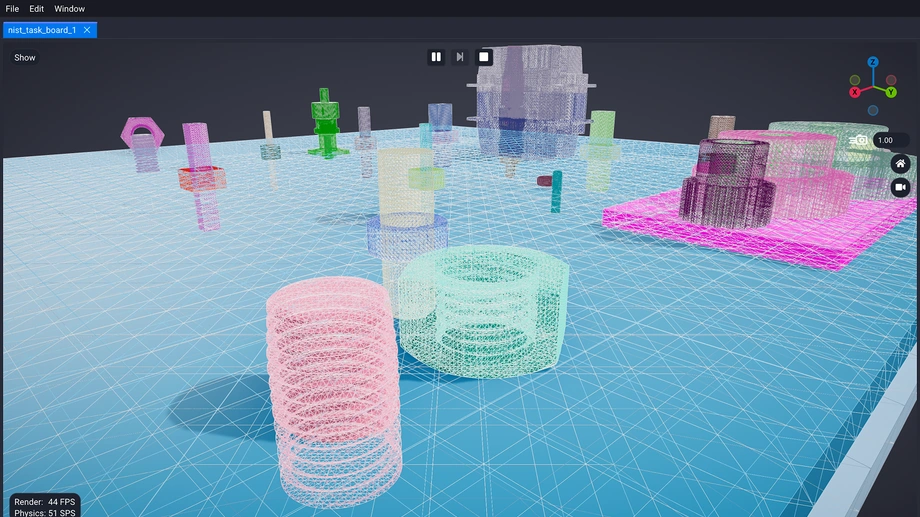
The Show button at the top-left of the viewport opens the visualization menu. Three of its entries are mutually exclusive stage modes; Mochi Debug Draw overlays the physics representation on top of whichever is active. They are the fastest way to see the difference between what you are rendering and what you are simulating.
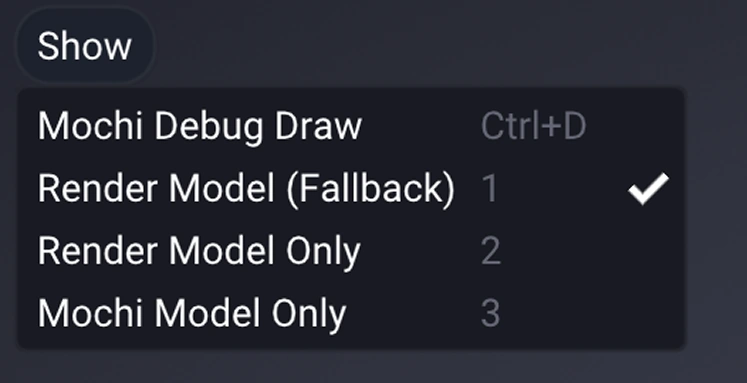
| Mode | Shortcut | What it shows |
|---|---|---|
| Render Only | 1 | Render meshes only. |
| Collision Only | 2 | Collision geometry only. |
| Render (Collision Fallback) | 3 | Render meshes, falling back to the collision model where no render mesh exists. |
| Physics Debug Draw | P | The physics debug overlay, on top of the current mode. |
The menu's contents depend on the editor. The Bot Editor adds toggles for the grid, joint limits, link transforms, inertia, and center of mass; the Model Editor registers none, so the Show button does not appear there at all.
Selecting and Transforming
Left-click an object in the viewport, or a row in the hierarchy, to select it, and
the two stay in sync. Selection resolves on mouse release, so a small drag
never picks by accident, and clicking the only selected object clears the
selection.
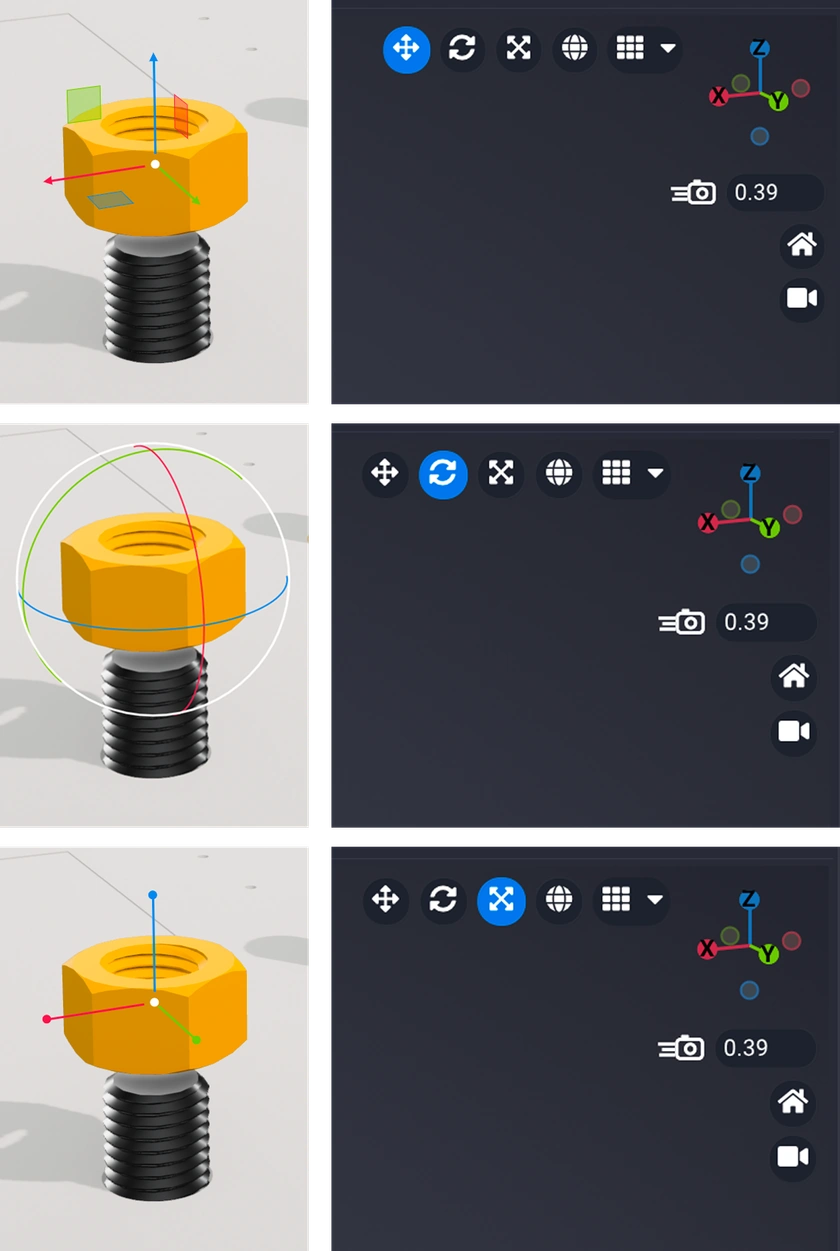
In the Prefab Editor, a transform gizmo appears on the selection: toggle it
through translate (W), rotate (E), and scale (R), or click the icons in
the viewport's top-right. The same toolbar switches the gizmo between local and
world space and sets
snap increments. The Prefab Editor is
also the only editor with multi-selection; Ctrl and Shift both toggle
individual objects when clicking in 3D.
The transform gizmo and its W / E / R shortcuts are specific to the Prefab
Editor. In the Bot Editor, link and joint transforms are edited numerically in
Bot Link Details.
Simulating Physics
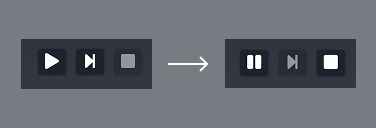
In physics-enabled viewports a transport sits at the top-center of the viewport.
Press Space to start the simulation and Space again to pause it, → to
advance a single frame, and Esc to stop. Stepping while the simulation is
stopped starts it paused, so you can walk through the opening frames one at a
time and watch a contact resolve. The transport only appears in the editors that
run physics, so a Model Editor tab never shows one.
While the simulation runs you can reach into it. Left-click and drag any
physics-enabled body to pull it around, and Scroll while dragging to push it
further away or draw it closer. It works on rigid bodies, articulated links,
and soft bodies alike, which makes it the fastest way to sanity-check a joint
limit, a contact, or a mass that feels wrong before you go back to editing
numbers. Editing is locked while the simulation runs: the hierarchy and details
panels go read-only and undo is unavailable, so stop the simulation before you
change anything. Stopping also returns every body to the pose it started from,
which means a run is always a throwaway experiment rather than an edit you have
to undo.
Asset Browser
The Asset Browser behaves like a file explorer: a folder tree on the left, a
tile grid on the right, and a breadcrumb across the top. Drag and drop works as
expected, with Ctrl to copy instead of move, as do Ctrl+A, Ctrl+C,
Ctrl+X, Ctrl+V, Ctrl+D to duplicate, and Delete. Double-click a folder
to enter it, an asset to open it in an editor, or an importable file to start
the import wizard. The mouse's back and forward buttons navigate folder history.
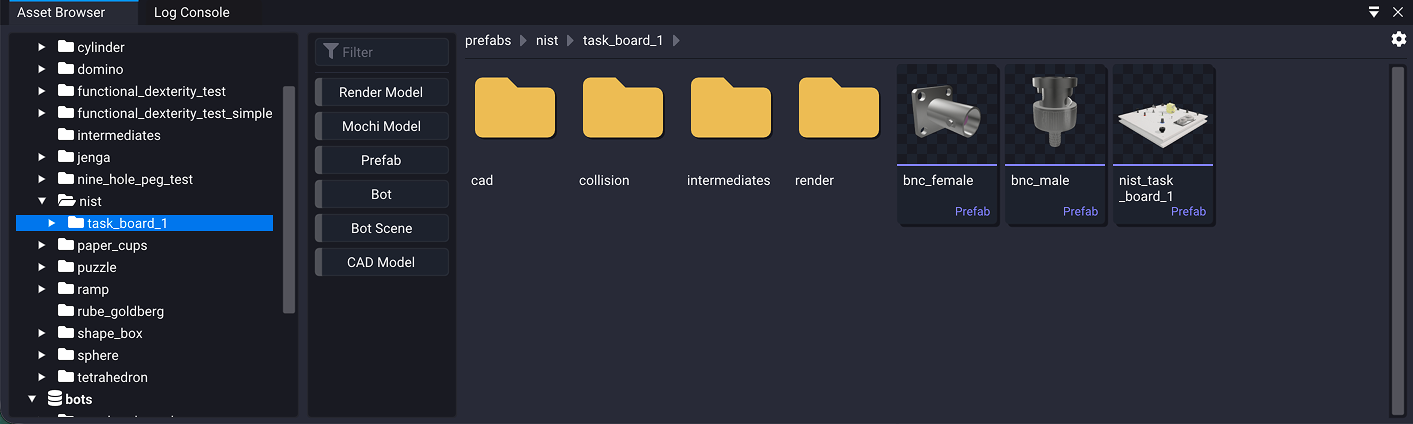
The roots of that tree are your workspace. File → Open Folder… replaces
them, File → Add Folder to Workspace… adds another alongside, and
Right-click a root for Remove from Workspace. Roots persist between
sessions, and opening a bot walks up to its enclosing .superdex_root and adds
that folder for you.
It recognizes the formats Studio works with, and color-codes them:
| Type | Extensions |
|---|---|
| Render Model | .glb .gltf .obj .dae |
| CAD Model | .step .stp .stl |
| Collision Model | .mochi.h5 |
| Prefab | .mochi_prefab .mochi_scene |
| Bot | .superdex_bot |
Clicking a type filter reveals every matching file in the current folder and its subfolders, hiding folders while it is active. It is the quickest way to find all the collision meshes in a tree.
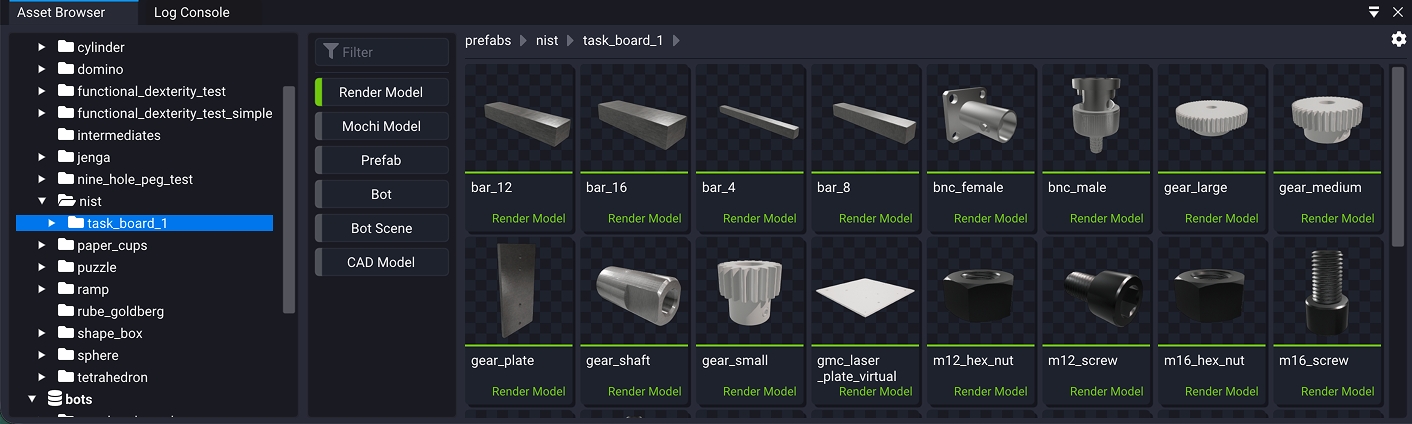
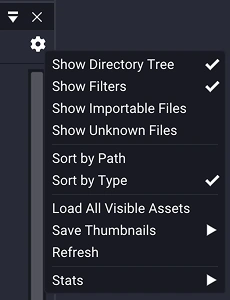
The cogwheel at the top-right controls what the panel shows and how it sorts. Show Directory Tree and Show Filters hide the two side panels when you want the whole width for tiles, and Show Importable Files and Show Unknown Files decide whether anything Studio cannot open appears at all. Below those, Sort by Path and Sort by Type set the tile order.
The same menu holds the bulk actions. Load All Visible Assets pulls every tile in the current view into memory, Save Thumbnails renders previews at a size you choose, and Refresh re-reads file associations after you have moved or renamed things outside Studio. Stats reports how many folders and assets the workspace holds, and how many of them are currently loaded.
Context Menus
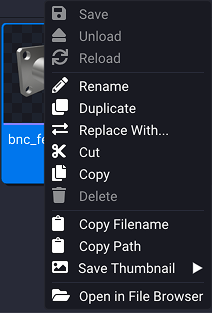
Right-click an asset and the menu opens with the load state: Load,
Save, Unload, and Reload. Then come the editing operations: Rename,
Duplicate, Batch Rename… when several are selected, and Replace
With…. Below those sit the clipboard actions, Cut, Copy, and
Delete, followed by Copy Filename, Copy Path, and Save
Thumbnail, and finally Open in File Browser.
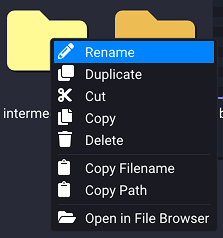
Right-click a folder for the same menu without the asset-specific
entries: Rename and Duplicate, the clipboard group with Paste
added, Copy Filename and Copy Path, and Open in File Browser.
Anything that would break a loaded reference is disabled rather than hidden. If another asset still points at this one, Unload, Reload, and Delete are grayed out with a tooltip explaining which reference is holding it.
File operations in the Asset Browser are not undoable. Ctrl+Z is bound to
the active editor's undo stack, not to the file system, so a rename or delete
here is permanent.
Log Console
The Log Console shares the bottom dock with the Asset Browser (in our
recommended layout) and is where Studio reports build status, import warnings,
and errors. Messages are grouped into four channels (Verbose, Info, Warning, and
Error), each with its own color and toggle, plus a free-text filter and a
Clear Logs button. Select rows and press Ctrl+C to copy them, or
Right-click to copy everything currently visible.
Heavy operations such as mesh processing, SDF baking, and contact estimation run off the UI thread behind a cancelable progress dialog; when one finishes or fails, the console is where the outcome lands. By default an error also raises the console automatically, so a failure never scrolls past unnoticed.
Hierarchy
The hierarchy panel is the structural view of whatever is open in the active tab, and what it contains follows the asset type. Selection is shared with the viewport in both directions.
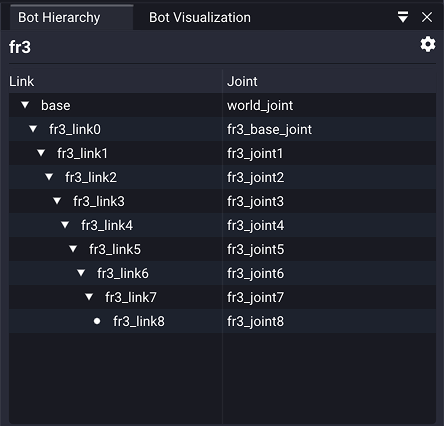
| Bot Hierarchy | Prefab Hierarchy | |
|---|---|---|
| Columns | Link · Joint | Name · Type |
| Structure | The link tree (or a flat list, via the cog) | A flat list of rigid, soft, articulated, and nested-prefab actors; articulated actors expand |
| Selection | Single | Multiple, with Ctrl and Shift |
| Add | Add Child Link, from the Right-click menu | Create Rigid / Soft / Articulated / Nested Prefab, by Right-click on empty space |
| While simulating | Disabled | Read-only, but selection still works |
The Bot Hierarchy flags validation problems with a warning badge on the offending bot, link, or joint. Hover it for the reason. Reparenting is done through the Parent dropdown in Bot Link Details, not by dragging rows.
Details
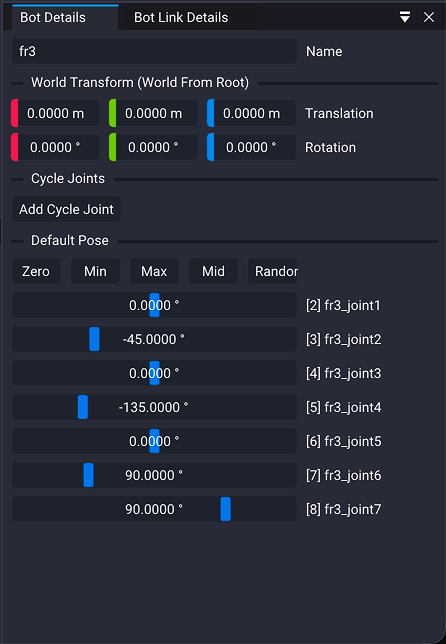
Details is the inspector for the current selection, and it is split across more than one panel so that asset-level and selection-level properties do not fight for the same space.

| Panel | Scope | Holds |
|---|---|---|
| Bot Details | The whole bot | Name, world transform, cycle joints, default pose. For a Mod Bot, the base bot and its modification list instead. |
| Bot Link Details | The selected link | Its parent, its inbound joint, and the link's own mass, inertia, and model slots. |
| Prefab Details | The whole prefab | Scene settings: gravity, solver, and friends. |
| Actor Details | The selected actor | Sections that change with the actor kind: rigid, soft, articulated, or nested prefab. |
The field-by-field reference lives in the Bot Editor and Prefab Editor guides.
Assets, File Types, and Editors
Opening an asset launches the editor registered for its type:
| Asset | File | Editor |
|---|---|---|
| Bot | .superdex_bot | Bot Editor |
| Prefab | .mochi_prefab, .mochi_scene | Prefab Editor |
| CAD / Render / Collision model | STEP, .glb, .mochi.h5 | Model Editor |
Read-only _archive variants of the bot formats open in the Bot Editor with
editing disabled.
See also
- Bot Editor Guide — articulation, contacts, and Mod Bots.
- Prefab Editor Guide — composing actors into a prefab.
- Model Editor Guide — the modifier stack that builds collision geometry.